
BACKING UP
Happy is a computer that has been backed up.
Secure is a computer user who backs up regularly.
This page is based on a presentation given in January 2007. It was updated September 2017. This update is 27 October 2024. The illustrations are mostly from screenshots of a Mac with Sequoia (Mac OS 15)
CONTENTS
- Hard Drive Data Structure
- Back Up Destinations
- Purchasing External Backup Drive(s)
- Setting up and using External Backup Drive(s)
- Software for backing up
- Using the Cloud
- Archiving Apple Applications
Hard Drive Data Structure
You Mac drive should have four folders and no data files and look something like this:
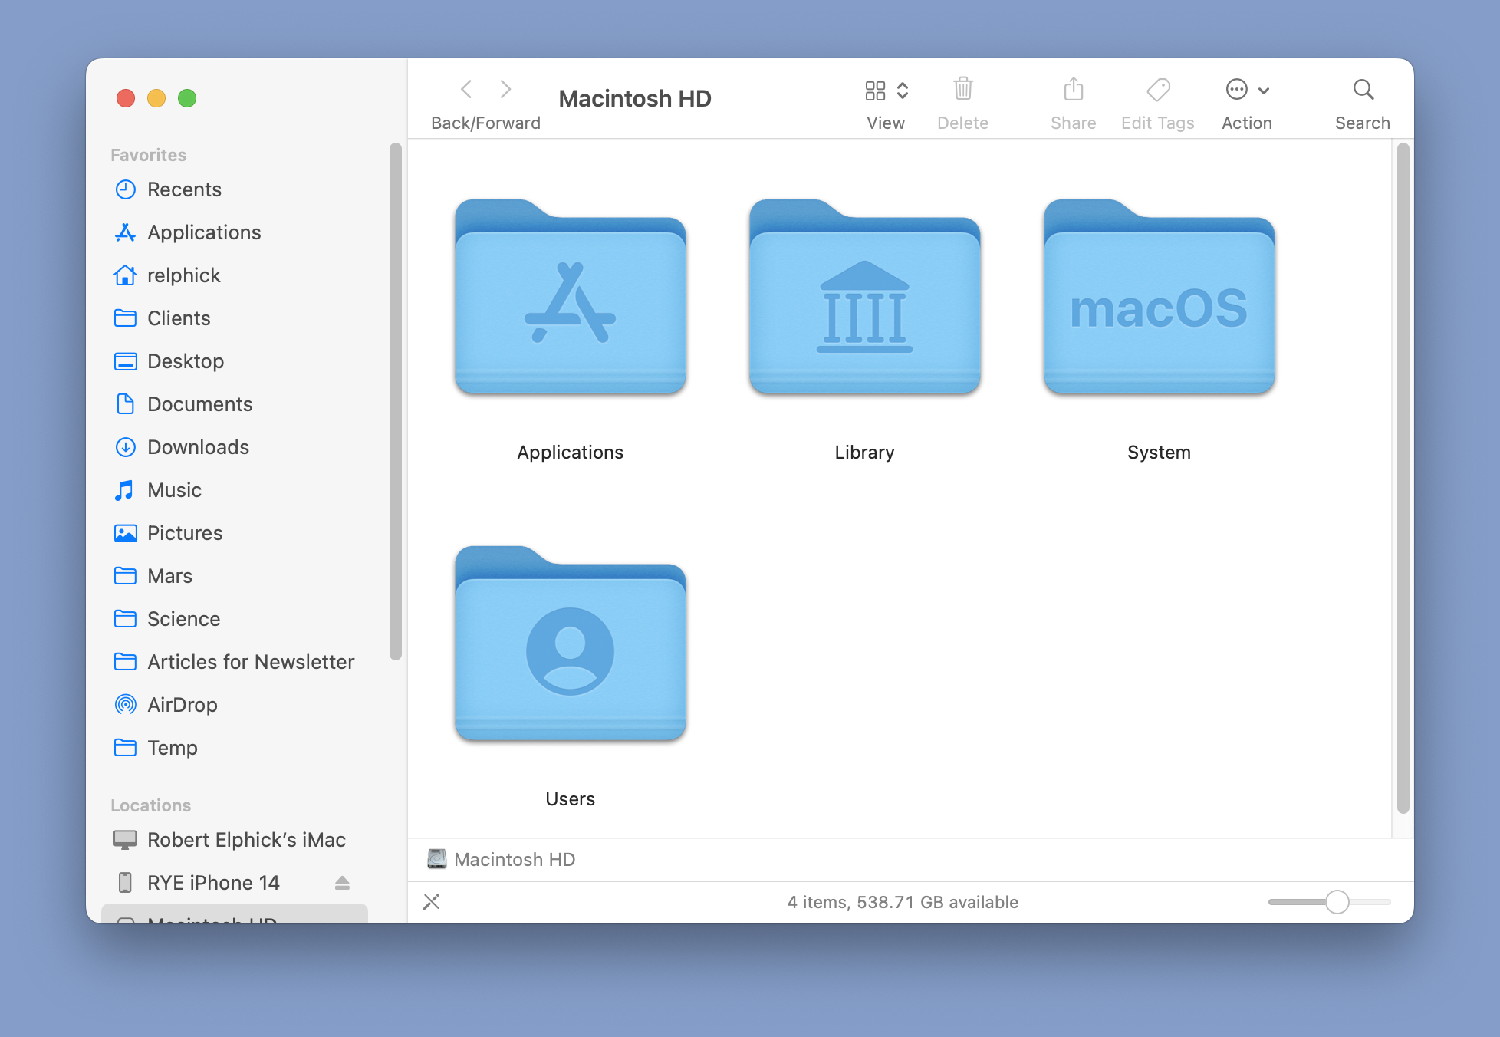
Users should normally only work in the Users folder. Within the Users folder should be several folders, one for each user on the computer and one for shared data like this:
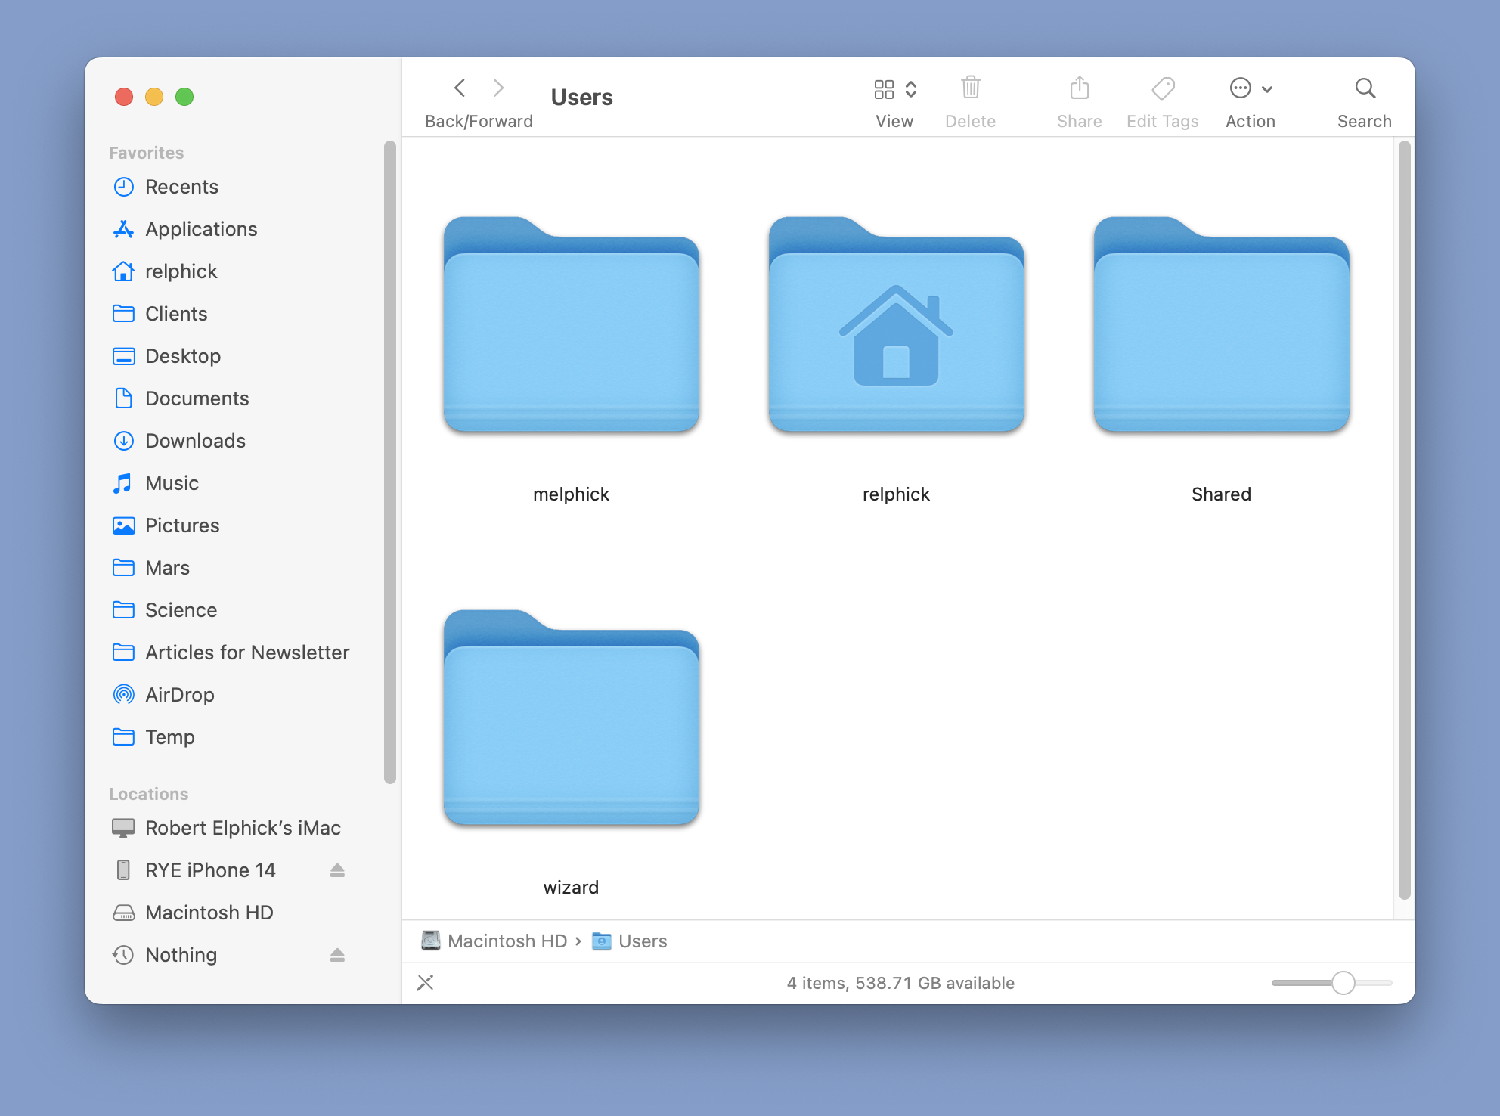
Note that the folder icon for the current user has the "Home" shape. Also note that you should have an 'emergency' account just in case your user account becomes damaged. Go ahead and create one if you have not done so and give it full privileges and a password that you will never forget!
Most MAGIC members will probably need to have two types of back up, one for everything on your hard drive to be performed every month or whenever you significantly upgrade your operating system or applications, and the second one done every hour with Time Machine.
Back Up Destinations
There are several possible destinations for the back up data they include:
| Destination | Comments |
|---|---|
| External Drive - either Disk (HD) or Solid State (SSD) | recommend at least twice the size of the internal drive. |
| CD-R or CD-RW - if a drive is available | Holds about 700 Mbytes |
| DVD - if a drive is available | Holds about 4.7 Gbytes single sided or 9.4 Gbytes double sided |
| the Cloud | WARNING - see below before using any cloud option including iCloud |
For most members of MAGIC, the external hard drive is probably the option that is most cost effective and easiest to use. A 1 TerraByte (about a thousand GigaBytes) or more External drive can be found on the internet for around $100.
CD and DVD drives are generally better for archiving projects or data sets that you are no longer working on. However, re-writable CD and DVD disks can be used also for regular backups of data sets.
Purchasing an External Backup
MAGIC recommends that you have two different backups. One for Time Machine that will backup all your files every hour and keep all the versions of the file as you are working on them. The second is to make a complete backup every month or so of your internal drive that is an exact image that can be booted in an emergency.
You can use one external drive and partition it into two virtual drives to contain both these backups you in which case you need to purchase an external hard drive that is three (or more) times the size of the internal drive. Better still, get two external drives, one that is as big as the internal drive to be used for FULL backups, and one that is at least twice the size (more is better) to use with TimeMachine.
Find the size of your internal drive
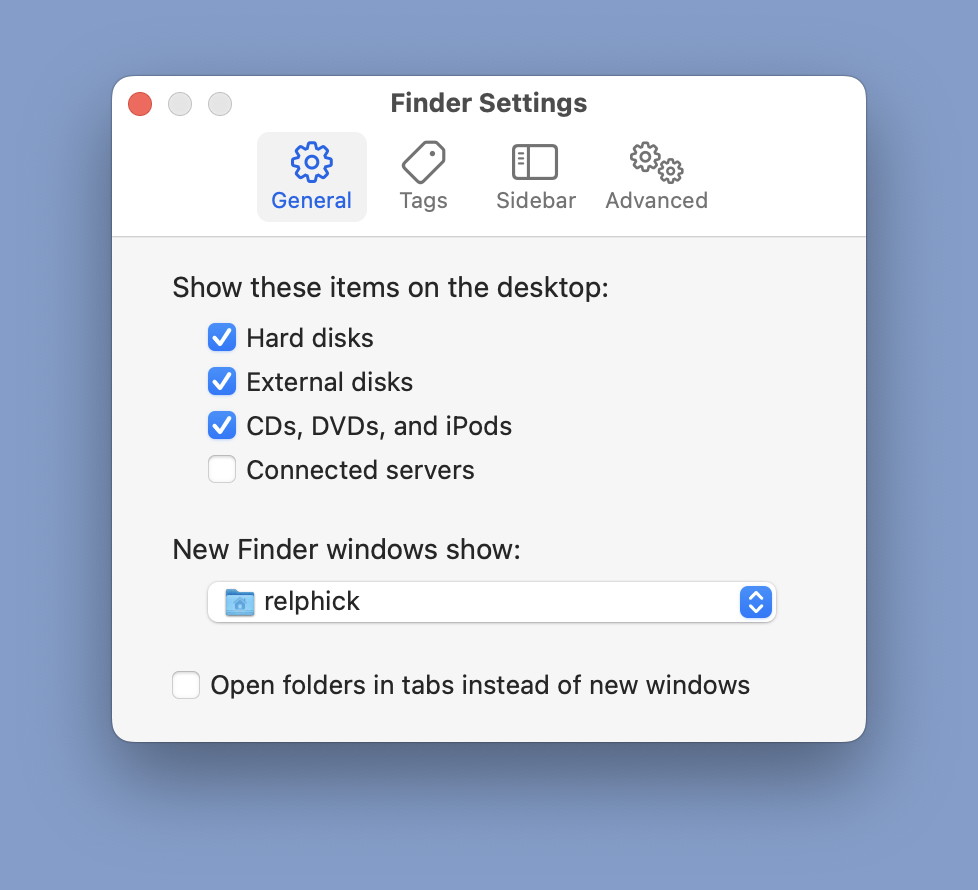
First check that the Internal Hard drive is visable by checking it in the Finder Preferences.
Once it is visible, click once on the drive icon on the desktop and chose the menu item File -> Get Info

Read the Capacity to find out how big the hard drive is. We recommend that you purchase an external drive at least 3 times this amount. In this example a 3 TByte drive would be suitable.
Speed
Macintosh computers are designed to accept several interfaces used by external hard drives. These include (from fastest to slowest):
- Thunderbolt
- USB-C
- USB-2
Manufacturers
There are a number of well know manufacturers that produce reliable products with good warrantees. These include:- Western Digital (WD)
- LaCie
- G-Technology
- Seagate
Off site backup
Disasters can occur where the computer is located. Many of these will not only damage the computer but the external backup drive(s) as well. Disasters are very unusual and include:
- Earthquake
- Fire
- Flood
- Tornado
- Hurricane
Many who have survived Hurricanes and Earthquakes have lost all their data when the computers and the backups were destroyed.
Keeping an offsite backup somewhere other than your house give extra protection when disaster strikes. In Western Washington we are in Earthquake country. When the Cascadia fault next releases the damage will be widespread.
An emergency kit (you one in your house by the exit and one in your car, right?) should include a backup drive. I have one with a backup that is never more than a month old.
Setting up and using External Backup drive(s)
If you chose to just have one external backup drive then MAGIC recommends that is it three times the size of the internal drive and that it be partitioned with the system below.
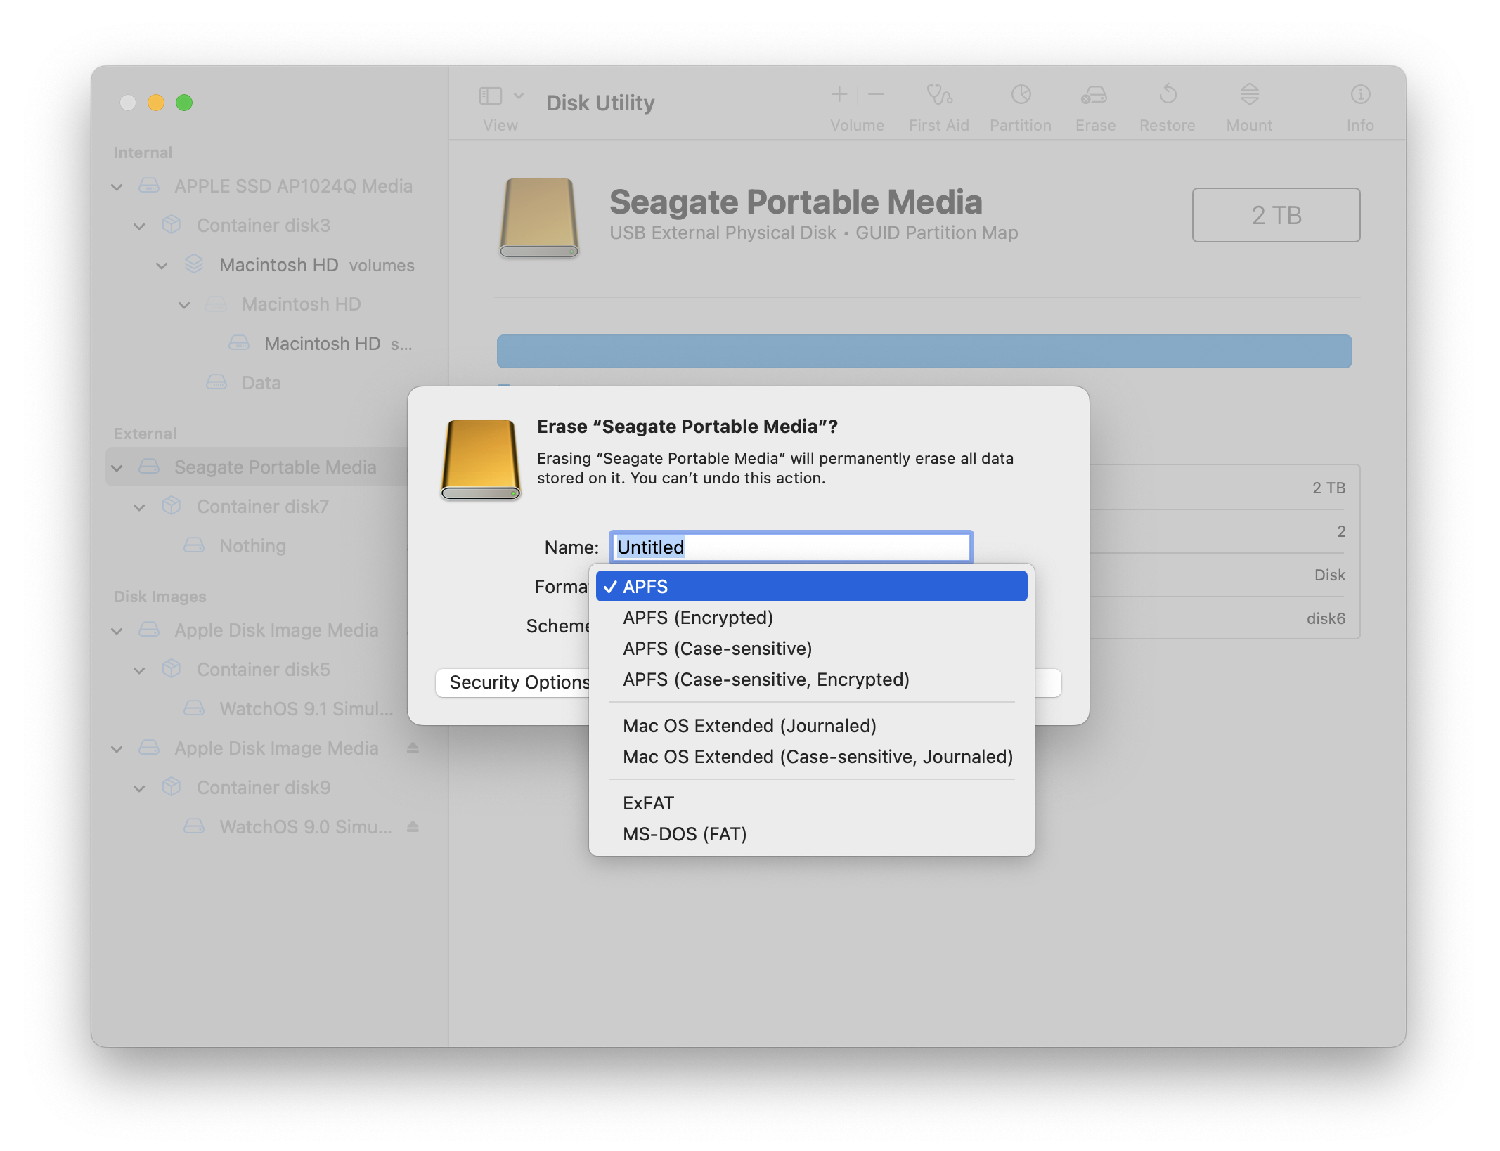
The new external hard drive should be partitioned such that one of the partitions is the same size as the internal hard drive. This partition will be used to make a complete bootable copy of the internal hard drive on a regular basis using SuperDuper!. The second partition will be used for hourly backup of just your data with Apple's Time Machine. The external disk drive can be partitioned using Disk Utility which comes with OS-X - it is in the Utilities Folder that is in the Applications Folder. Here are the steps:
- Plug in and power up the new external drive and then hook it up to the appropriate port of your computer
- Start Disk Utility
- Select your new disk drive on the left side of the window
- Select the Erase icon at the top and then chose the APFS optionand let it finish reformatting the drive
- Click on the Partition button
- In the new window, choose the number of partitions (using the + and - buttons).
- Size and Name each of the partitions - make the Backup partition the same size as the size of the internal hard drive. Make the partition to be used as the Time Machine backup at least twice the size of the size of the internal hard drive.
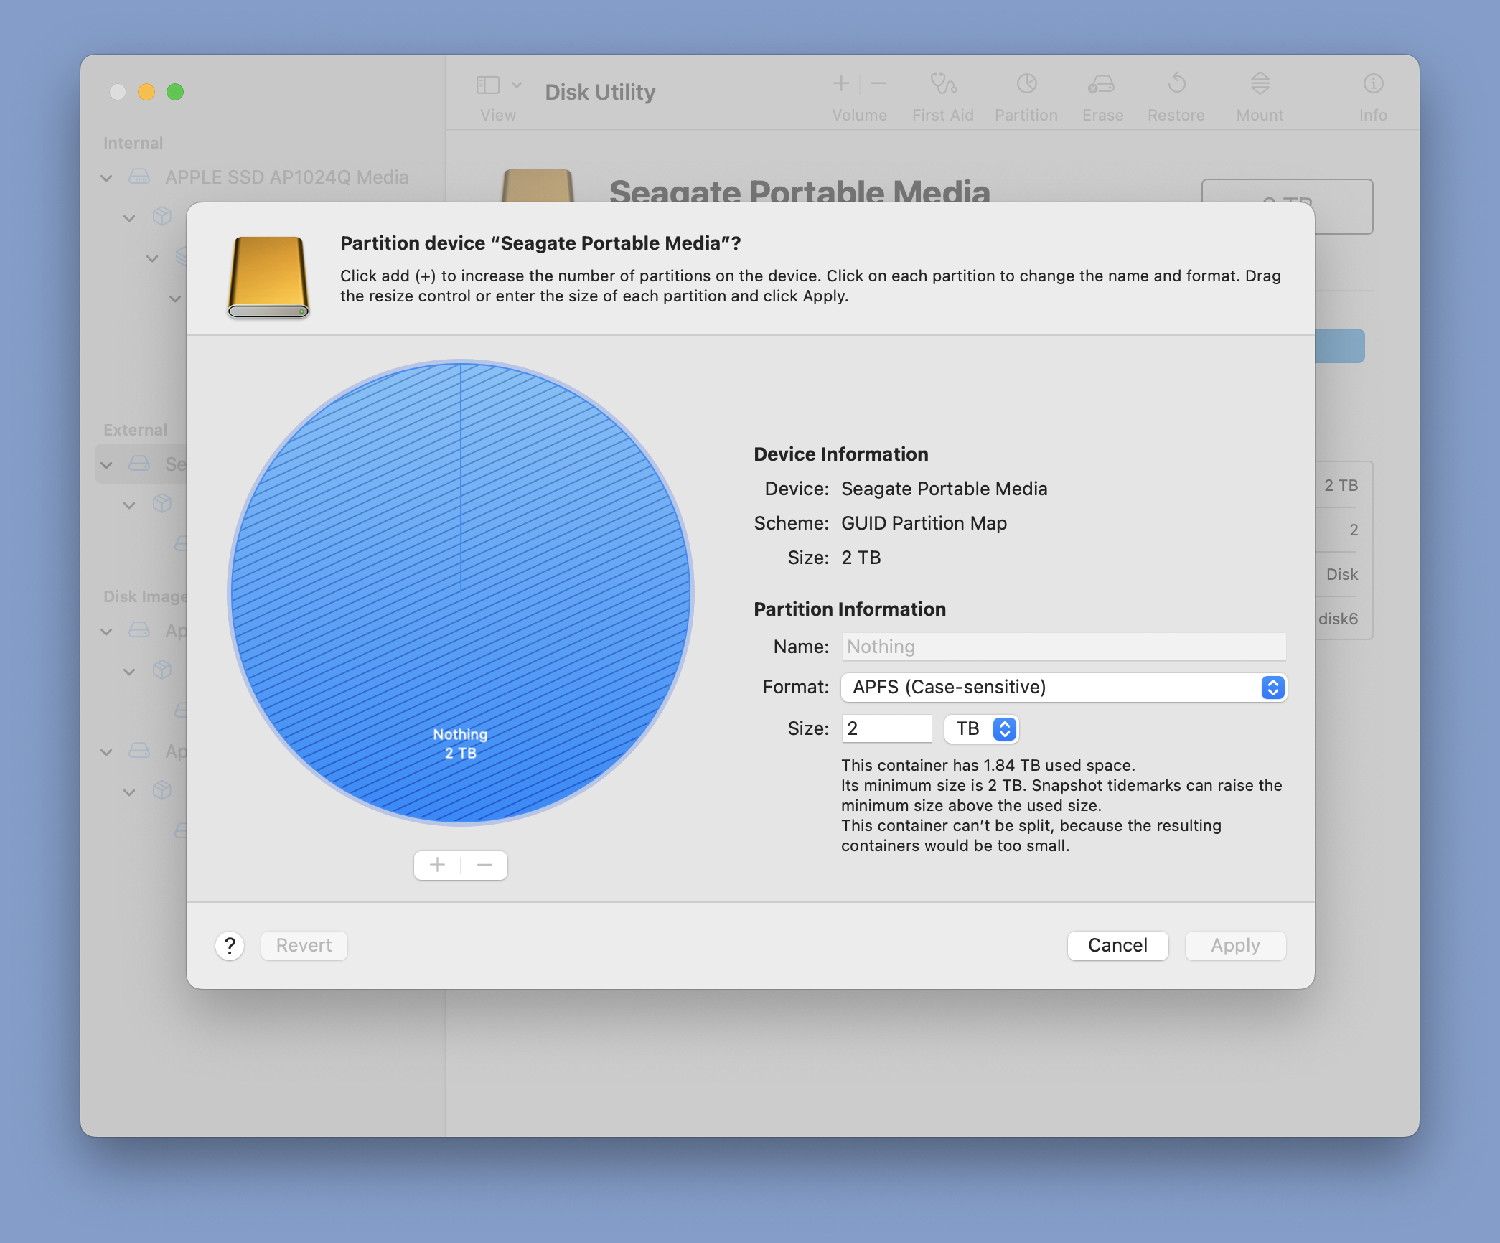
- Click on the Apply button
WARNING: Partitioning the disk erases any data on it.
Software for backing up
There are many applications and tools designed for backing up your data. Here are a few that are well tested by MAGIC, most members will be able to do all the backing up with just one of them:
Time Machine
Time Machine became part of OS-X starting with Leopard (OS-X 10.5). Turn it on in System Settings and also choose which disk (or partition partition) to use for this backup.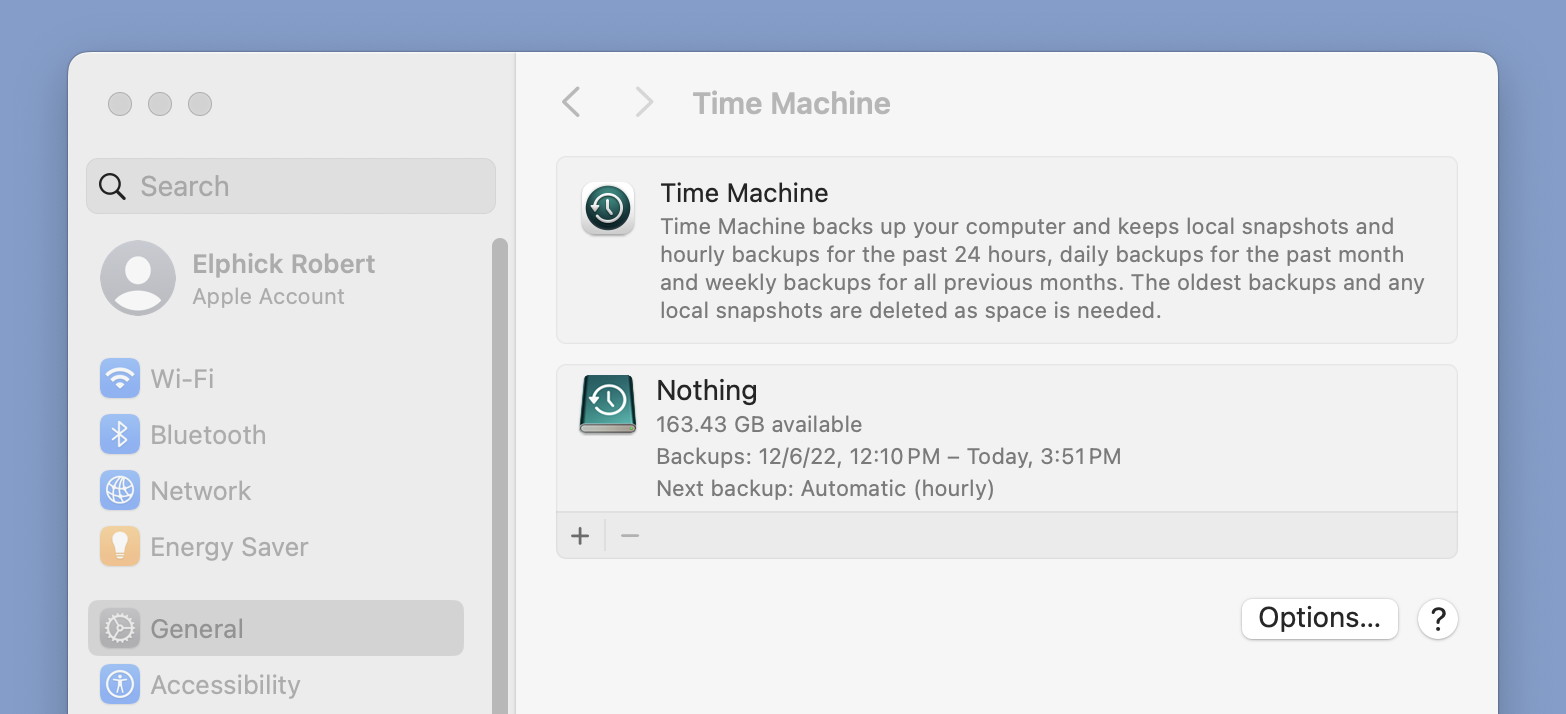
Keep the Time Machine drive plugged into your computer as much as you can.
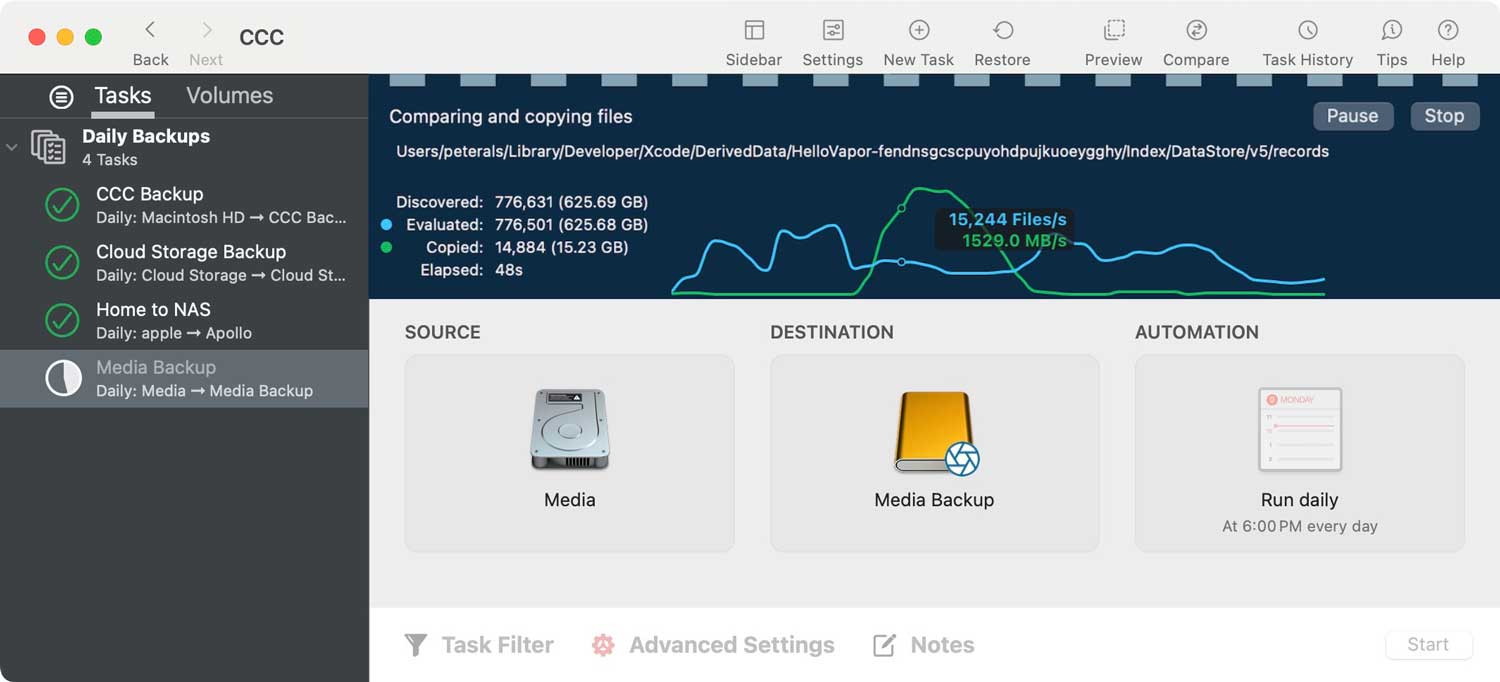
Carbon Copy Cloner
Carbon Copy Cloner provides a bootable back up. You are recommended to make the full back up of internal hard drive so that is bootable and you can boot on it in the event that your internal hard drive completely dies.
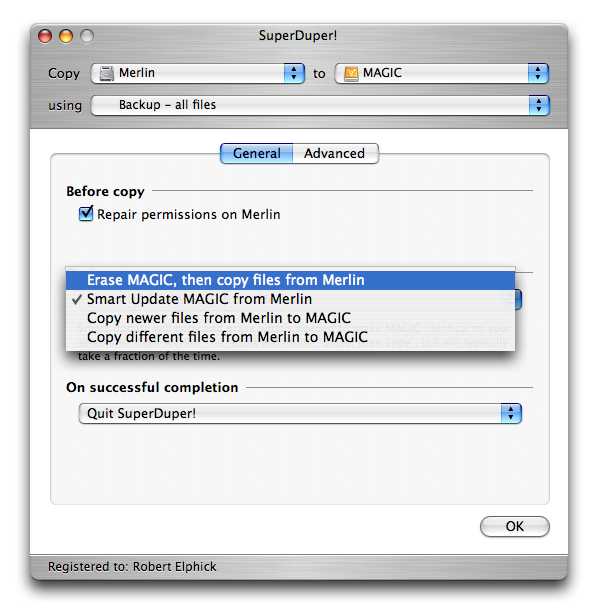
SuperDuper!
SuperDuper! provides a bootable back up. You are recommended to make the full back up of internal hard drive so that is bootable and you can boot on it in the event that your internal hard drive completely dies.
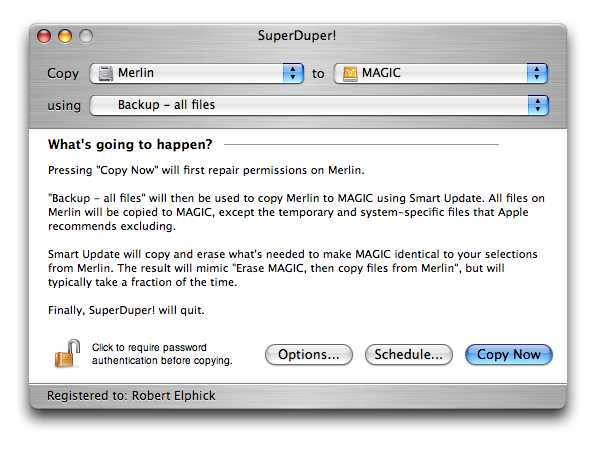
By pressing on the option button you can get a new window (below) where you can choose to make a new back up or perform incremental backups (if you paid for it) of all or parts of your disk.
Using the Cloud
DON'T!
OK, do not use any of the clouds out there until you fully understand the risk. There are two advantages:
- You can easily access (depending on which cloud) your data from any of your computers or devices.
- Your data will survive a local catastrophe such as a hurricane or earthquake.
- No cloud is safe from hacking, especially by international criminals who have access to massive resources.
Archiving Apple Applications
There are several Apple applications whose data should be archived from time to time in case something bad happens to any of them. These are:
- Calendar
- Contacts
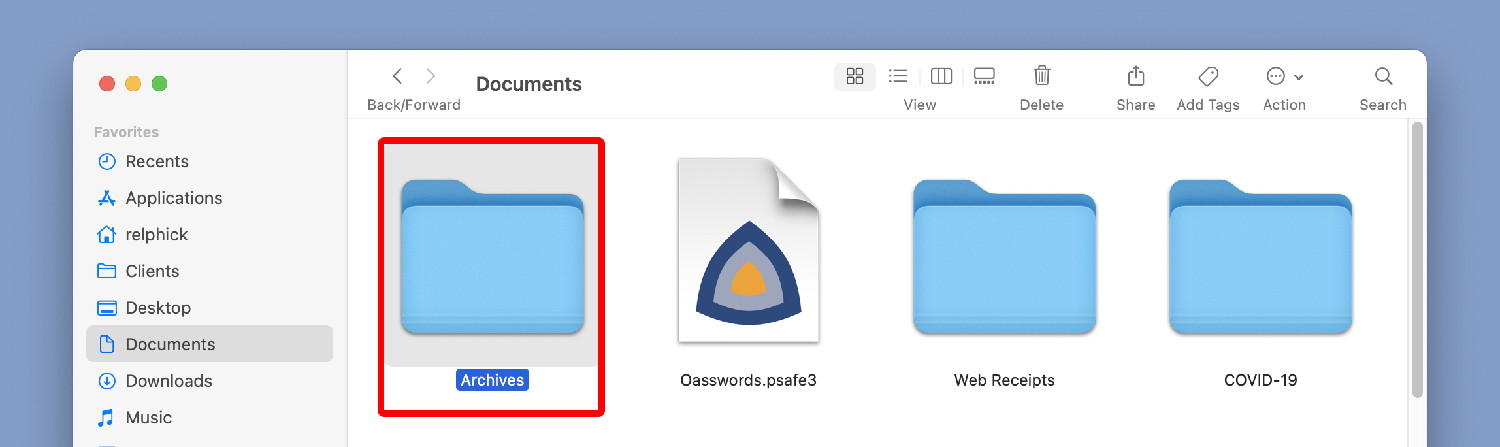
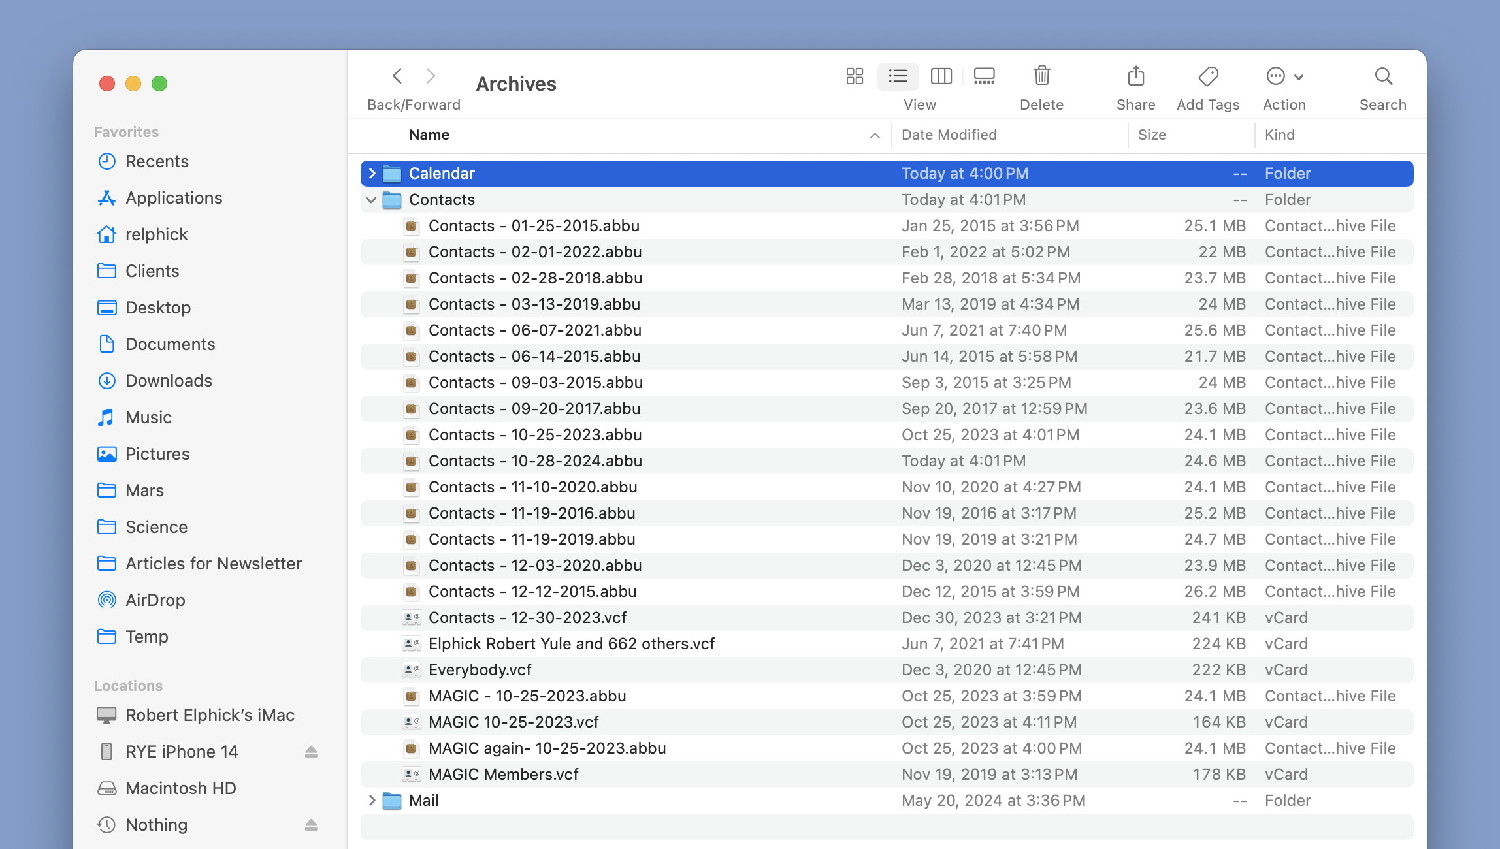
They all have archiving capability so it is just a matter of using them periodically. First suggestion is to make a folder to store all these archive files in. I suggest a folder called "Archives" and that it be placed in the "Documents" folder in your user area.
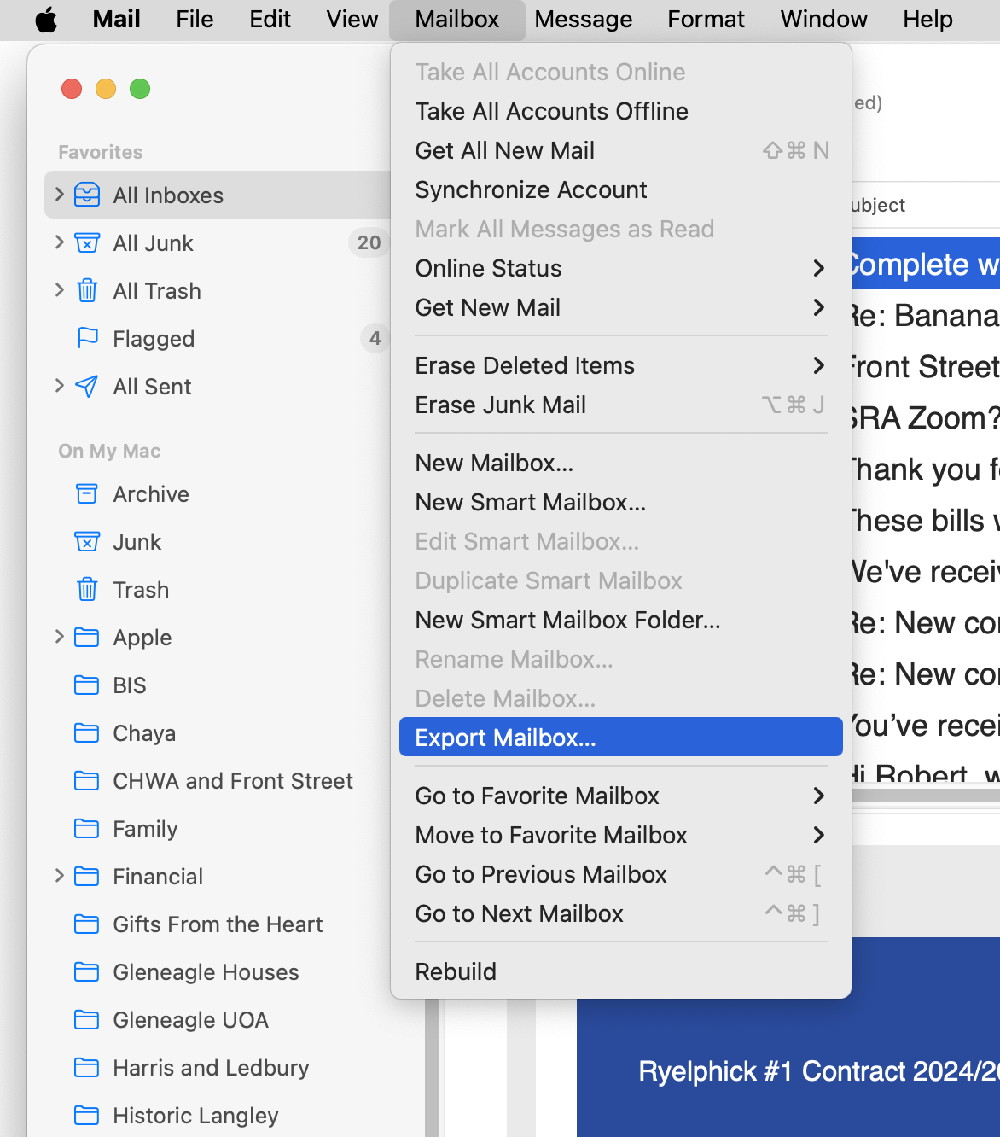
In the Mail application it is possible to archive either one mailbox at a time or select multiple mailboxes and archive them all into one archive file. Select the folder(s) and then go to the Mailbox menu and select Archive Mailbox.
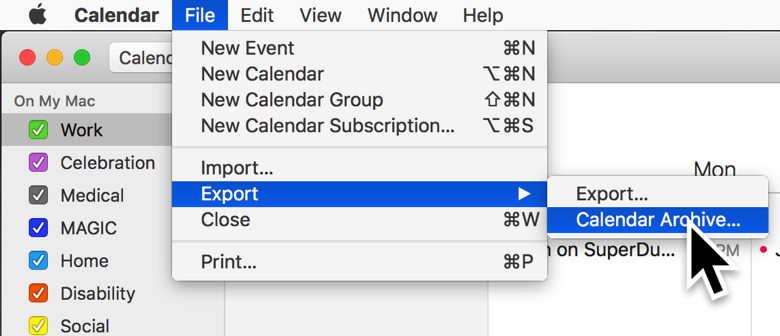
Calendar (iCal)
In the Calendar application it is possible to archive the whole data set. Go to the File menu and select Export->Calendar Archive…
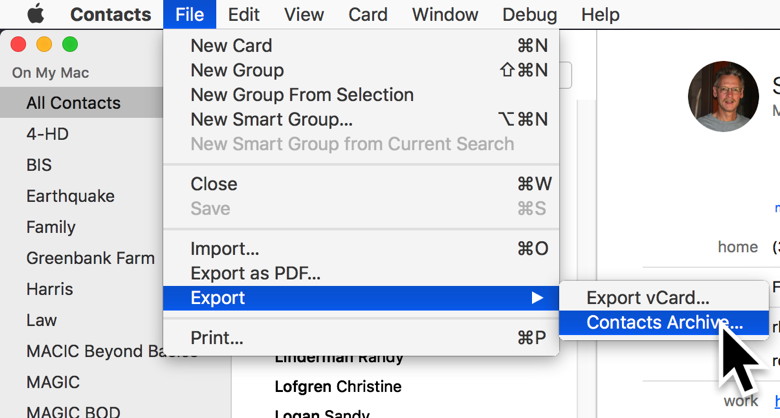
Contacts (Address Book)
In the Contacts application it is possible to archive the whole data set. Go to the File menu and select "Export->Contacts Archive…".
|
Copyright: |

©Macintosh Appreciation Group of Island County (MAGIC) 2007 - 2017
|