
NOTES - The whole story
CONTENTS
Introduction
Notes a great Application for storing all kinds of information. Originally it was set up as a place to keep text notes but now it can also hold pictures, pdf files, and many other formats.
Notes runs on Macs, iPhones, and iPads.
Notes can be optionally shared across iCloud to all your devices. Go to the Sytem preferences for iCloud to turn this on.
Basics
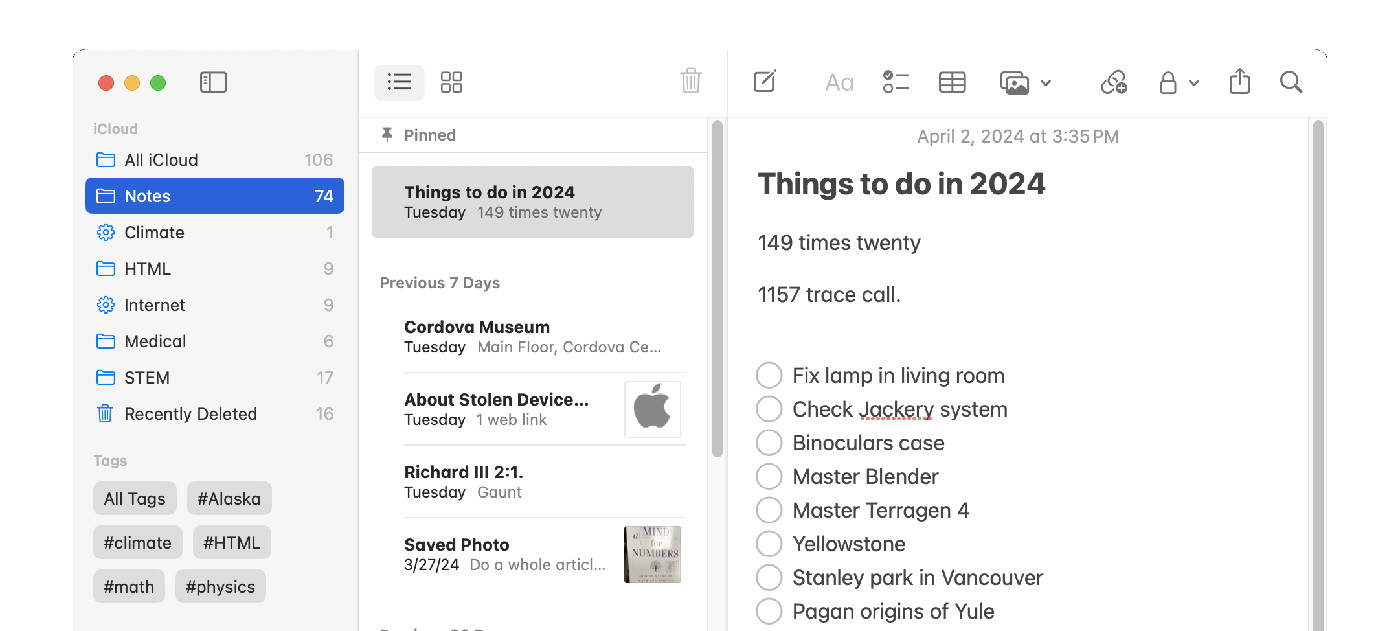
In the illustration there are three columns of data:
- Left column - List of folders
- Middle column - list of files within the selected folder
- right column - contents of the selected file
In the tab bar along the top there are the following icons that control the data:
![]() Turns on/off left column.
Turns on/off left column.
![]() Puts selection in list mode
Puts selection in list mode
![]() Puts selection in gallerey (icon) mode
Puts selection in gallerey (icon) mode
![]() Puts selection in the Trash
Puts selection in the Trash
![]() Open new note
Open new note
![]() Change format of text:
Change format of text: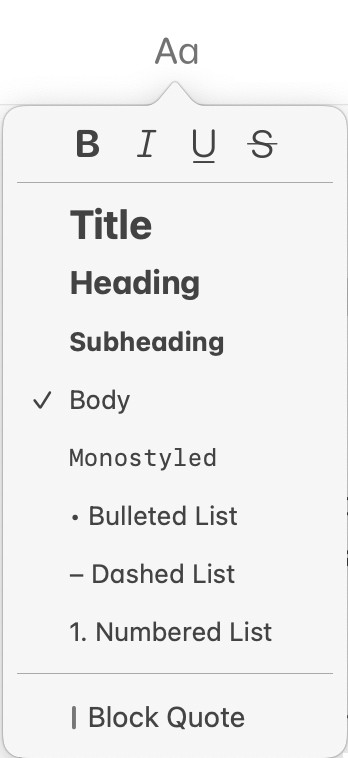
![]() Add a list
Add a list
![]() Add a table
Add a table
![]() Add Media including: photo(s), scan(s), and documents
Add Media including: photo(s), scan(s), and documents
![]() Add Link(s)
Add Link(s)
![]() Lock or unLock a file or folder
Lock or unLock a file or folder
![]() Export to another file type
Export to another file type
![]() Search for text within the selected item
Search for text within the selected item
In the iPhone version only one column is visible at a time and the user must switch between them.
Pins
In order to keep one or more notes at the top of the list instead of in order by date modified, notes can be pinned. Pinning a Note is done in the File menu:
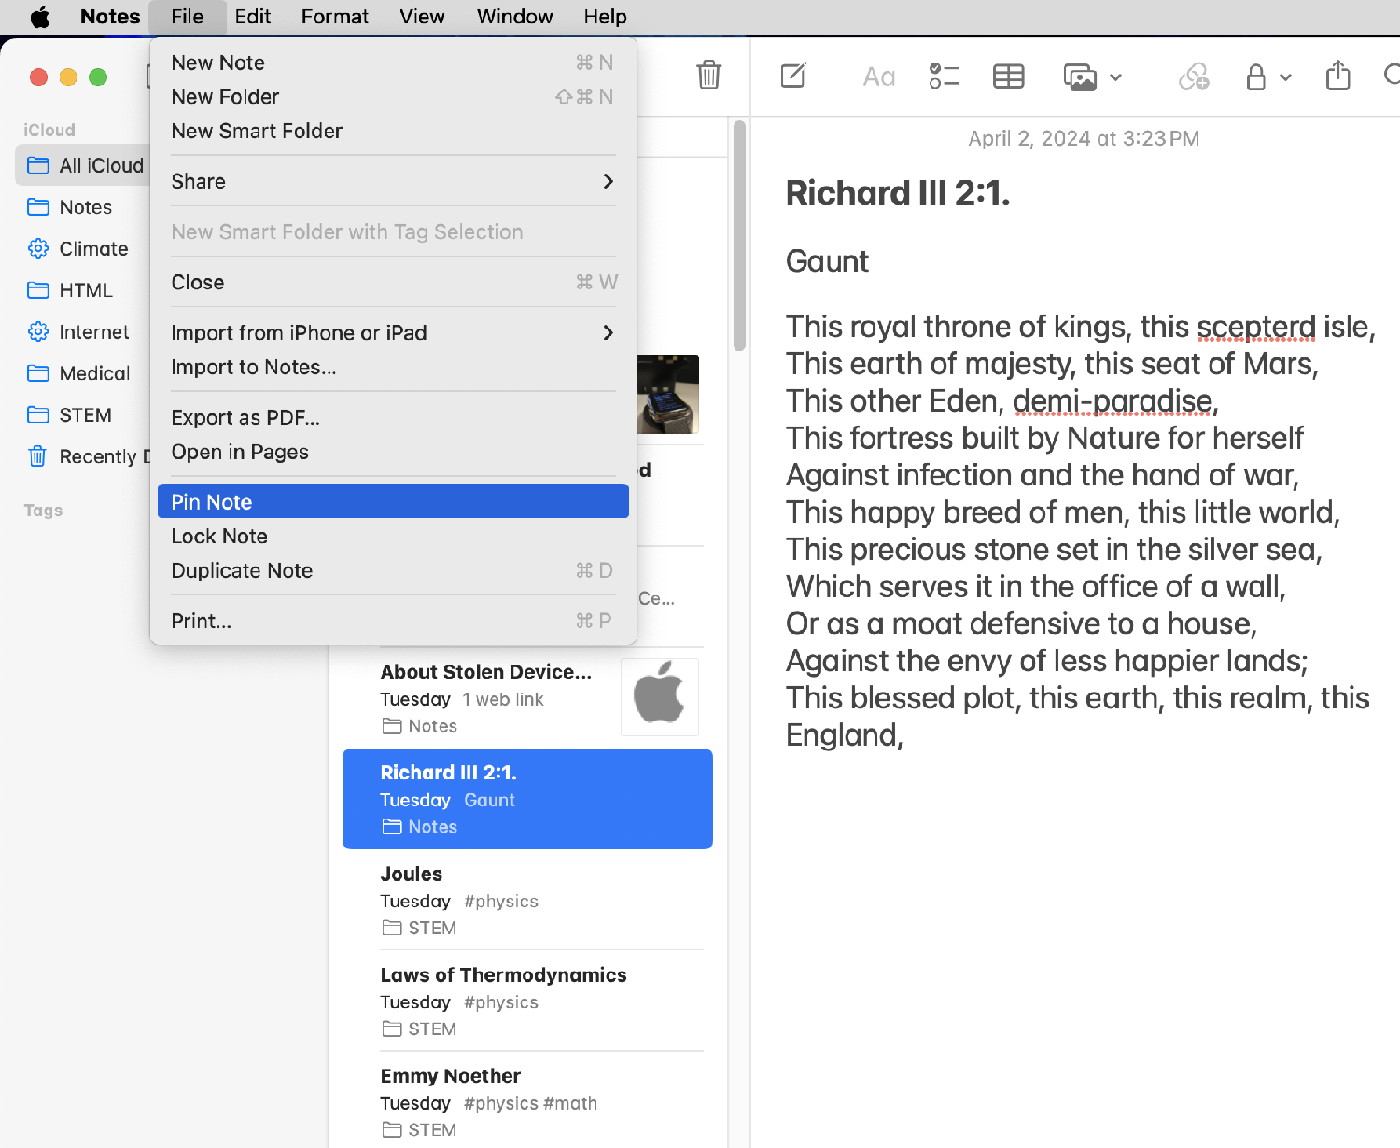
Note that this menu offers several other useful options including locking a note and exporting to a PDF file.
You can see that the pinned note in the example (top image) is at the top and the most recent notes are below. You can have several pinned notes.
Using Tags
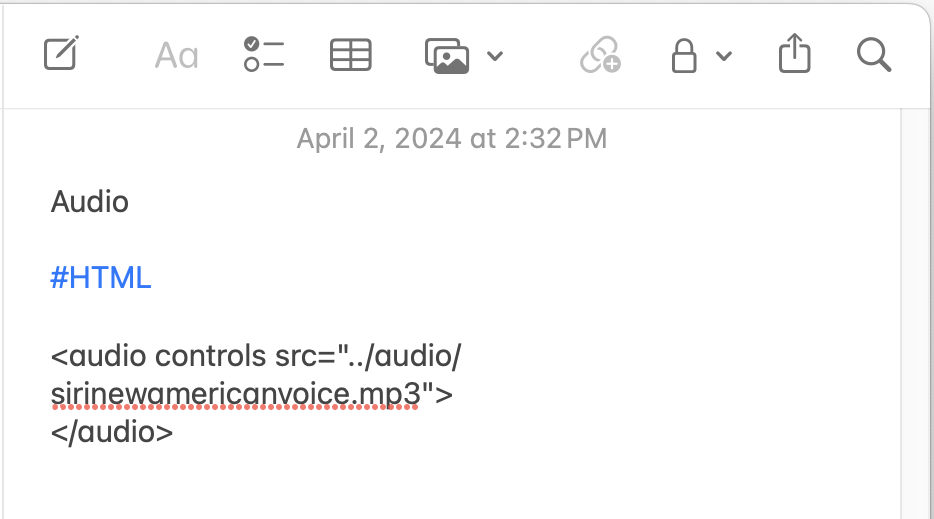
In a note, type a hashtag (#) followed by the name of your tag, then type a space. Tags appear in different colors to the note text.
Here is an example where I have included a hashtag as #HTML - note that the color changed.
A note can have multiple tags like this:
To find all the notes that have a tag, select one or more of the taga in the left hand column:
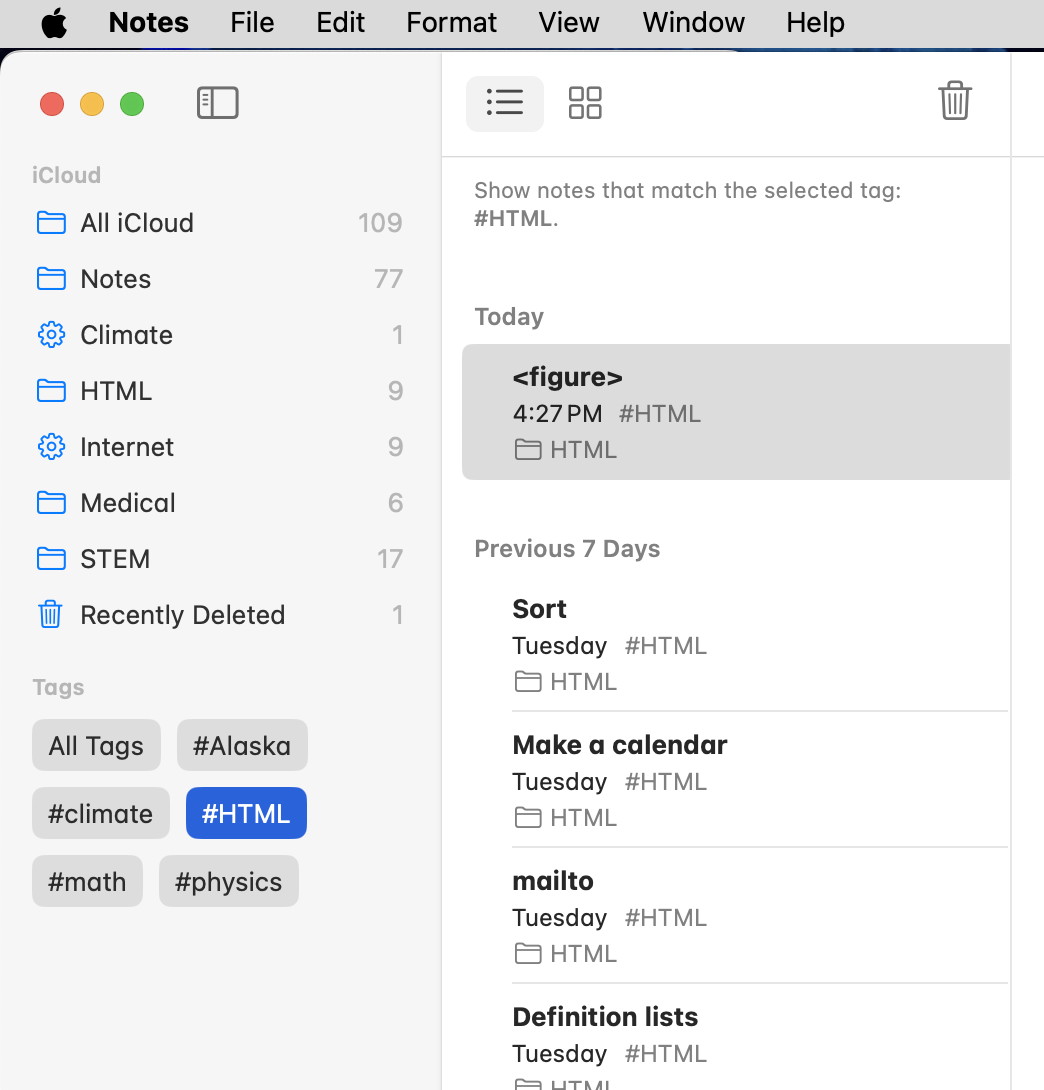
Example with one of the hashtags selected. It shows all the notes with that hashtag.
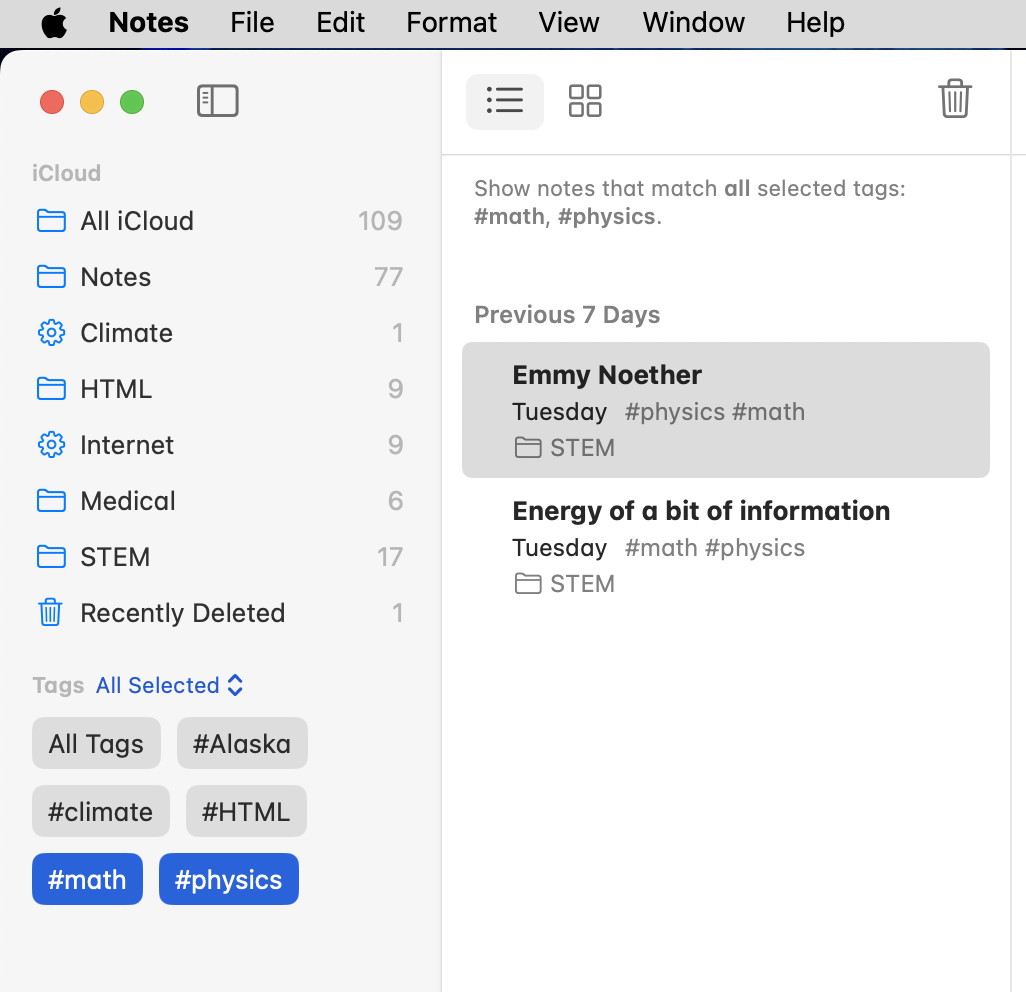
Example with two of the hashtags selected. It shows all the notes with both of these hashtags selected.
If you click on a hashtag a second time it will show a line through now only show the notes that do not have that hashtag (or those hashtags if more than one are selectred this way.
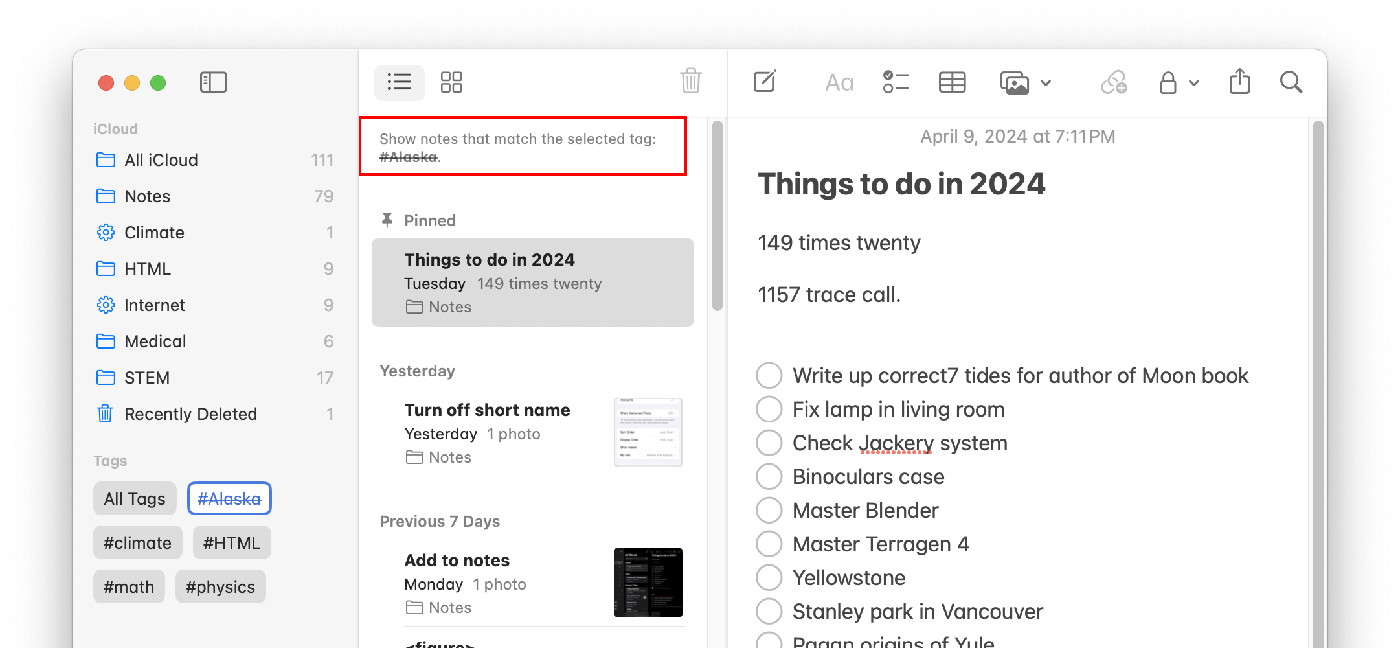
With "#Alaska" selected a second time it get lined trough and the to notes this hashtag are removed from the list. Note that at the top of the list this is indicated (see with red border).
In the Tags browser, tap and hold a tag to rename it or delete it.
Note that if the tags are not showing you may have to mouse over the "Tags" in the left hand column and then click on the little arrow to its right.
Using Links
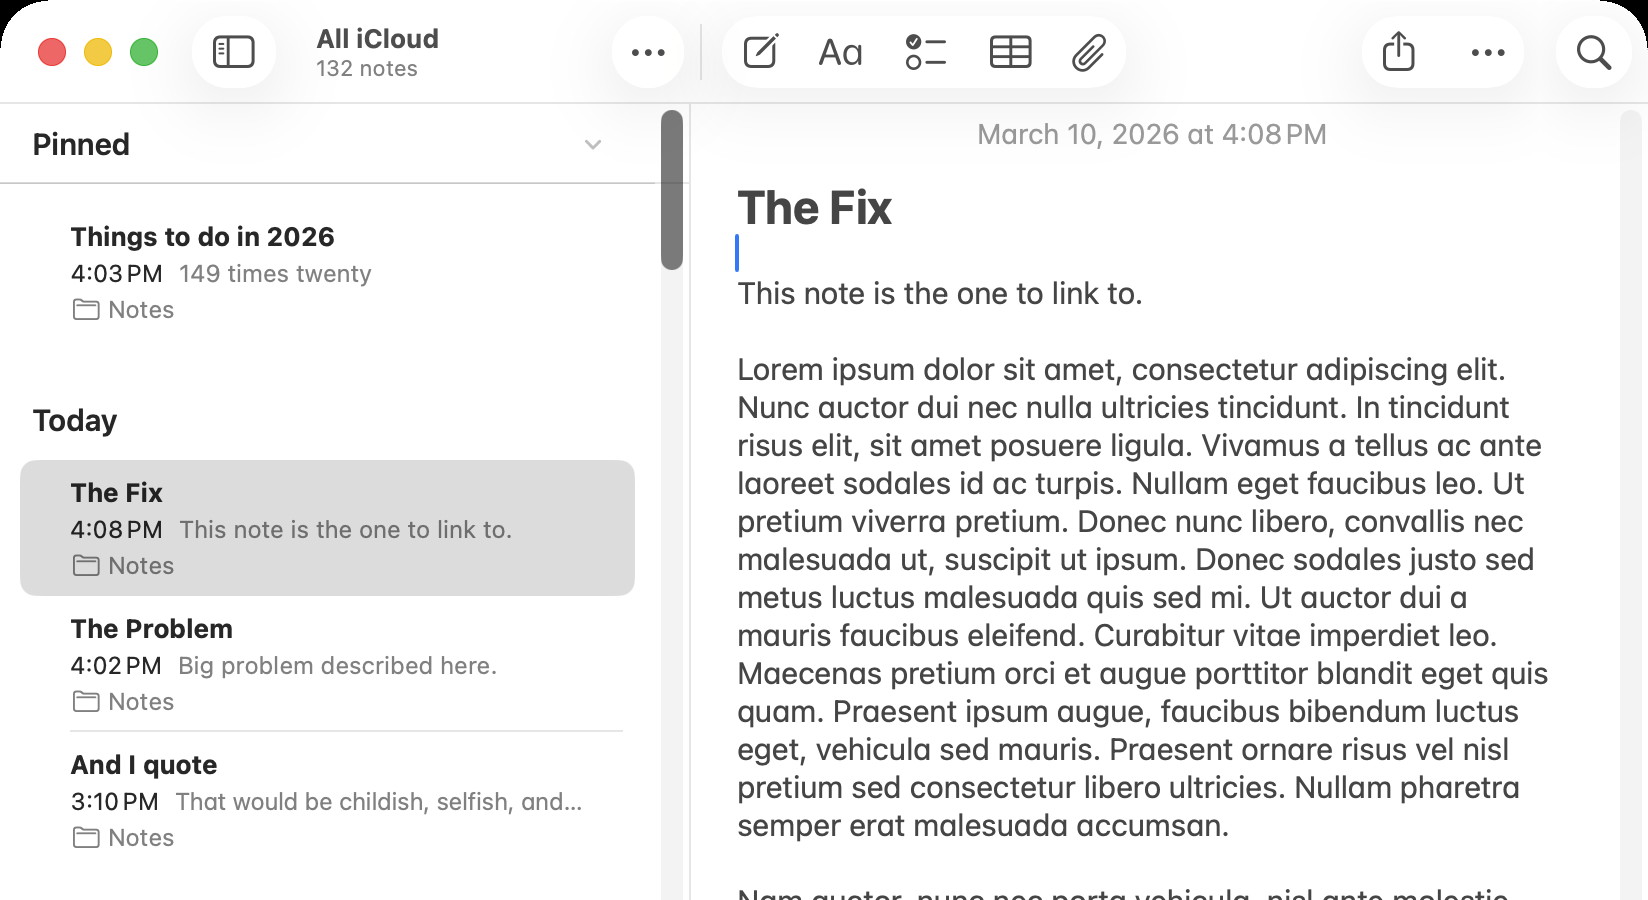
You can link Notes together. Put a link in one Note to reference another. First generate the Note that you want to link to:
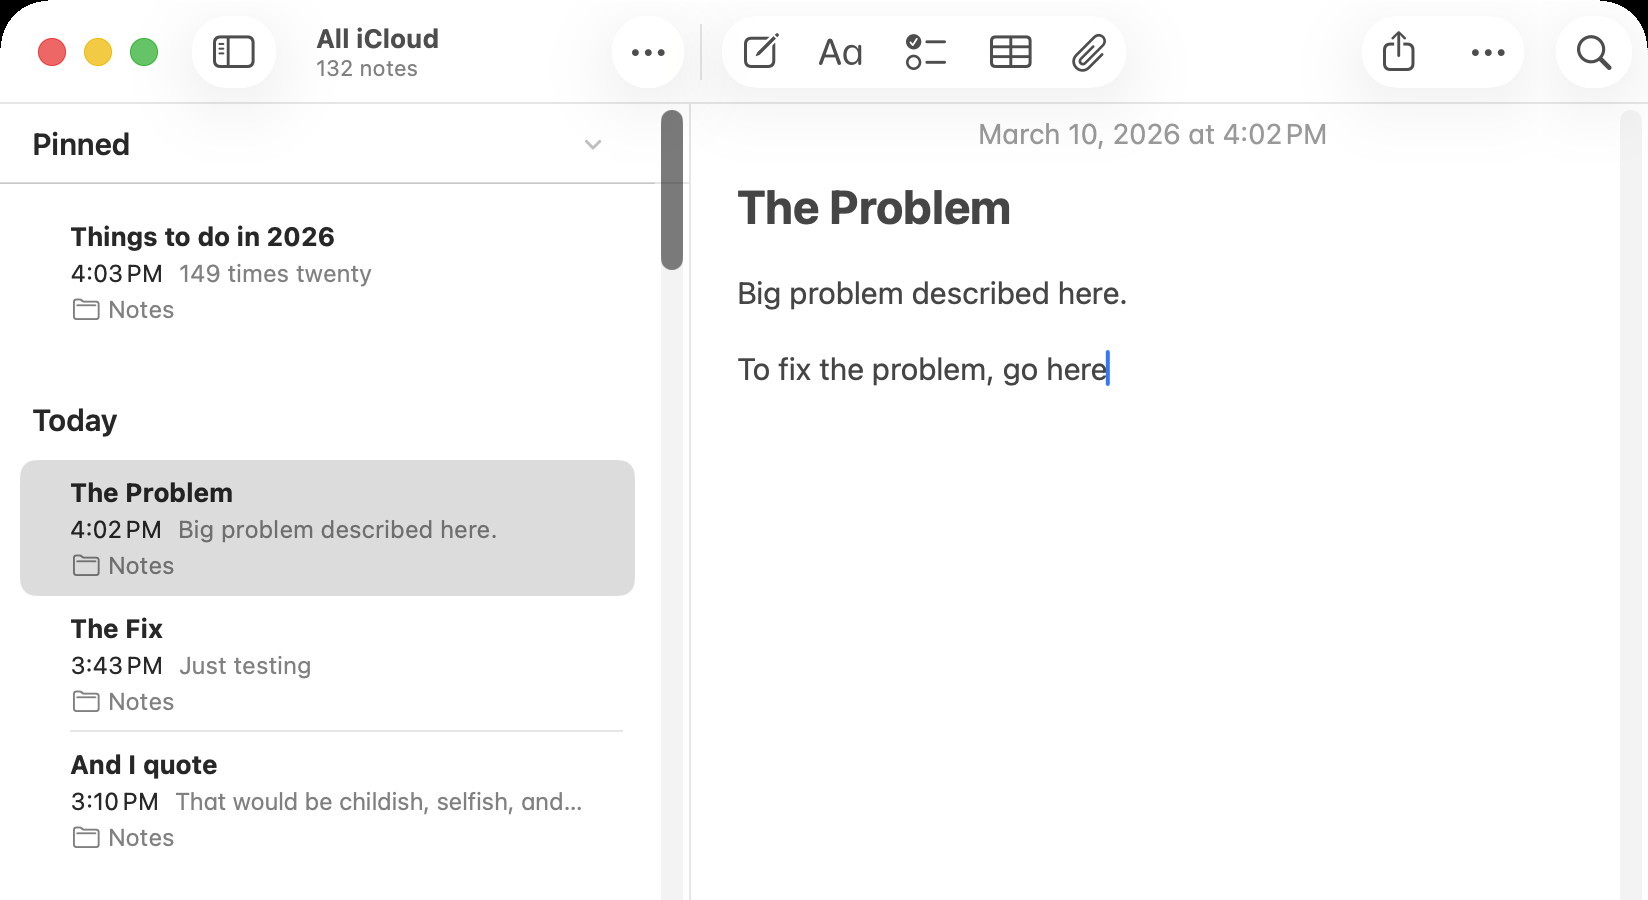
Then create the new Note that you want to contain a link to the previous Note:
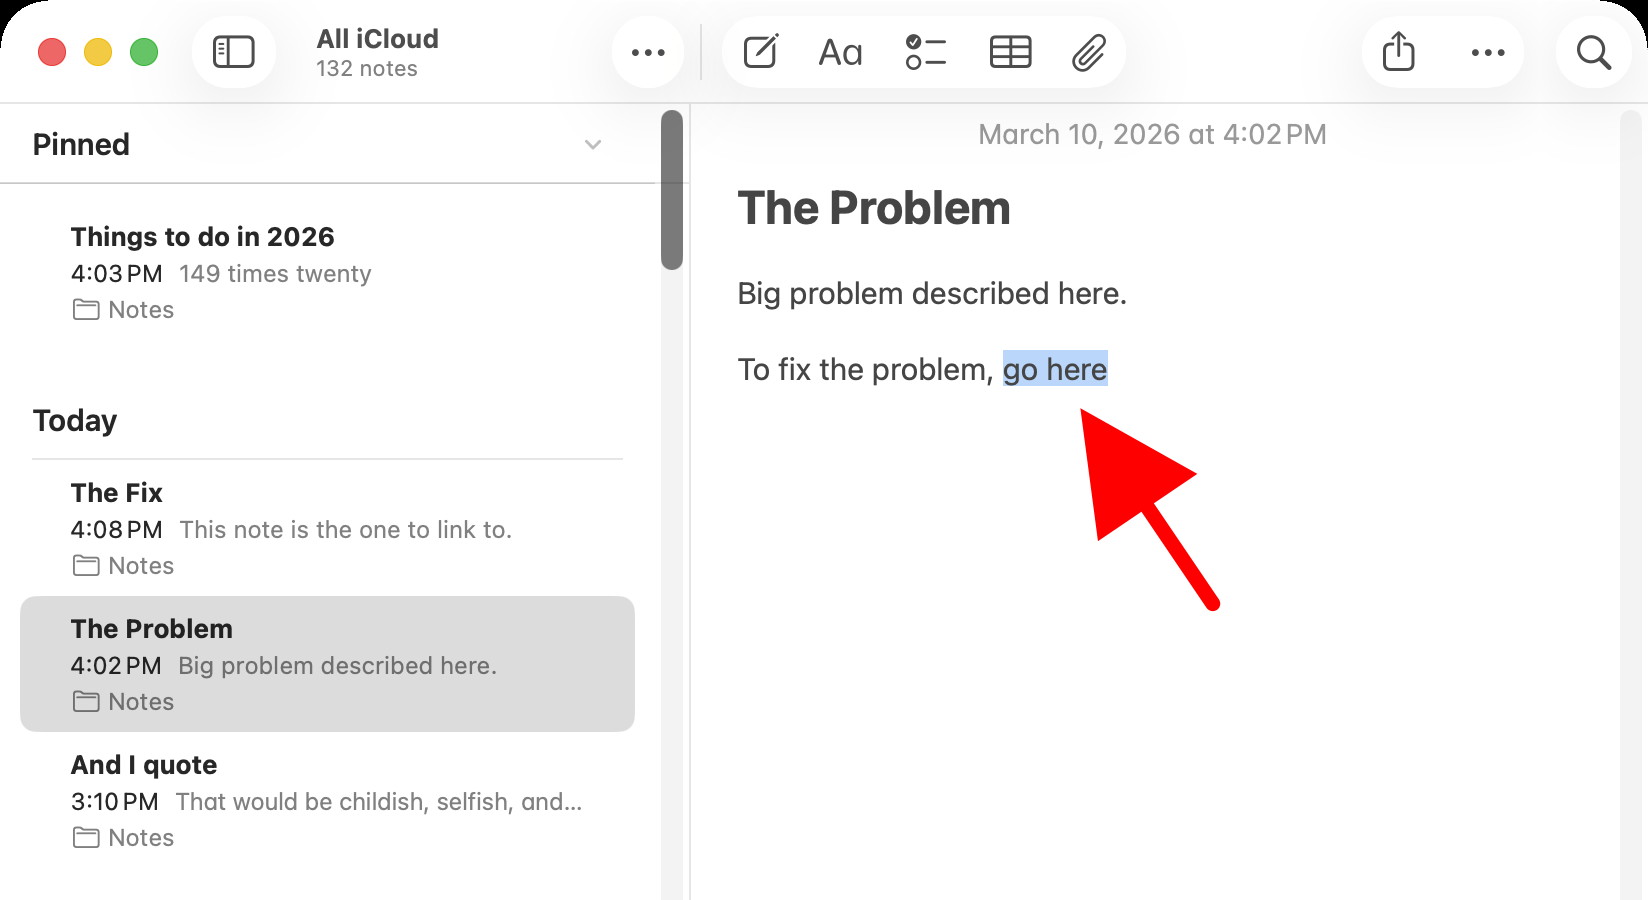
Then Select the text (or picture) that you want to use as the link:
And right click on the selection to get a pop-up menu:
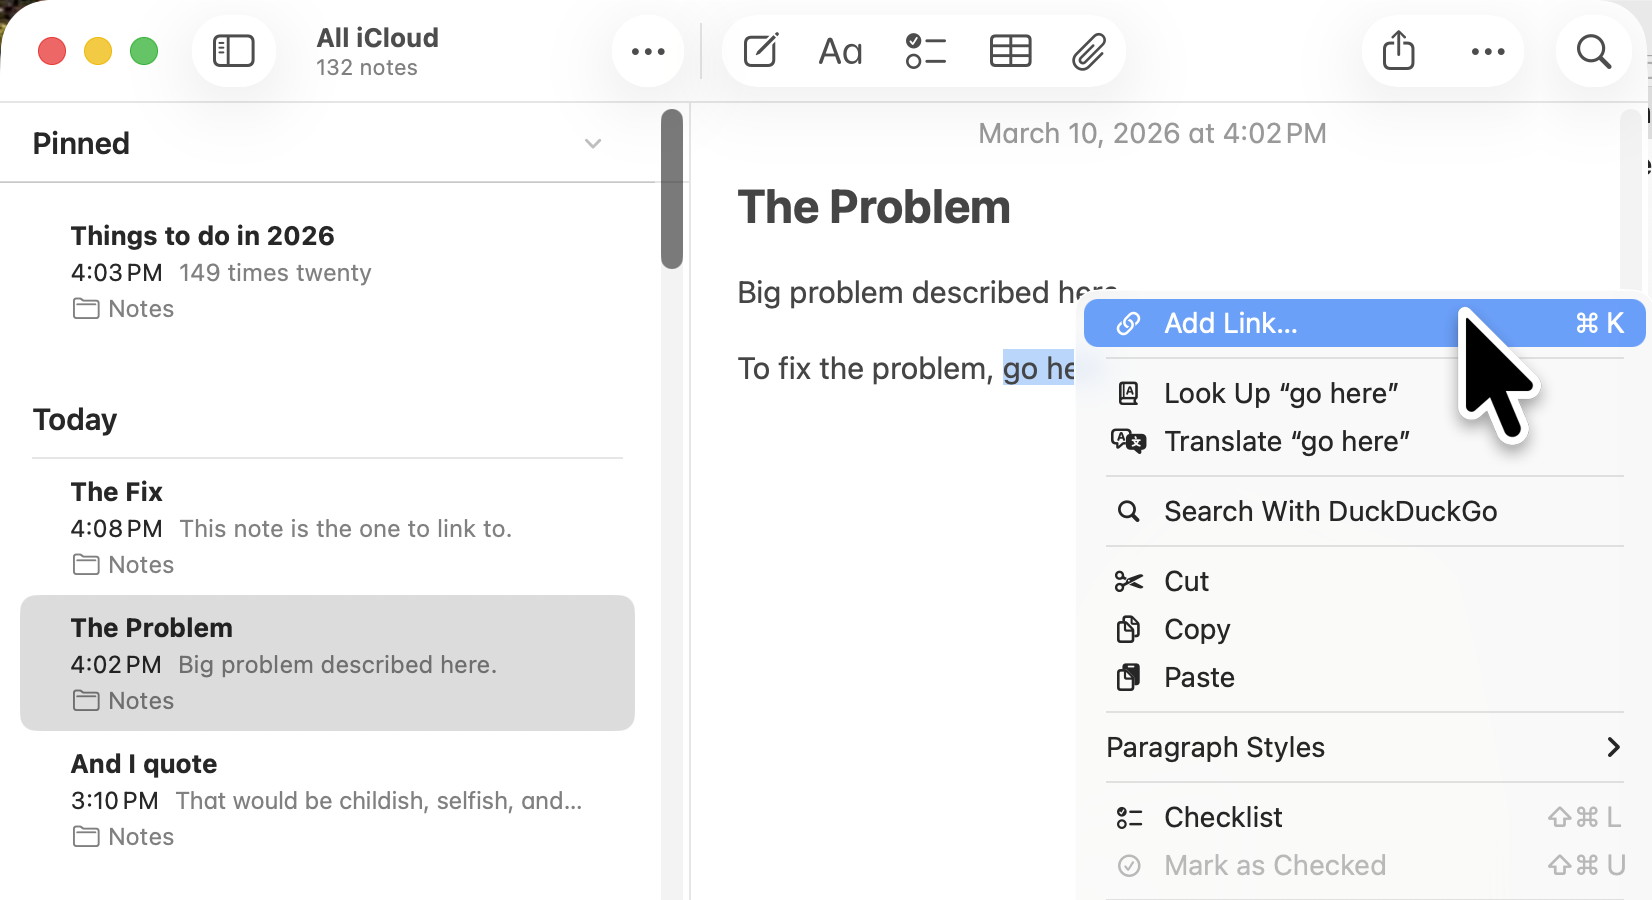
Select "Add Link" and then chose the Note you wish to link to:
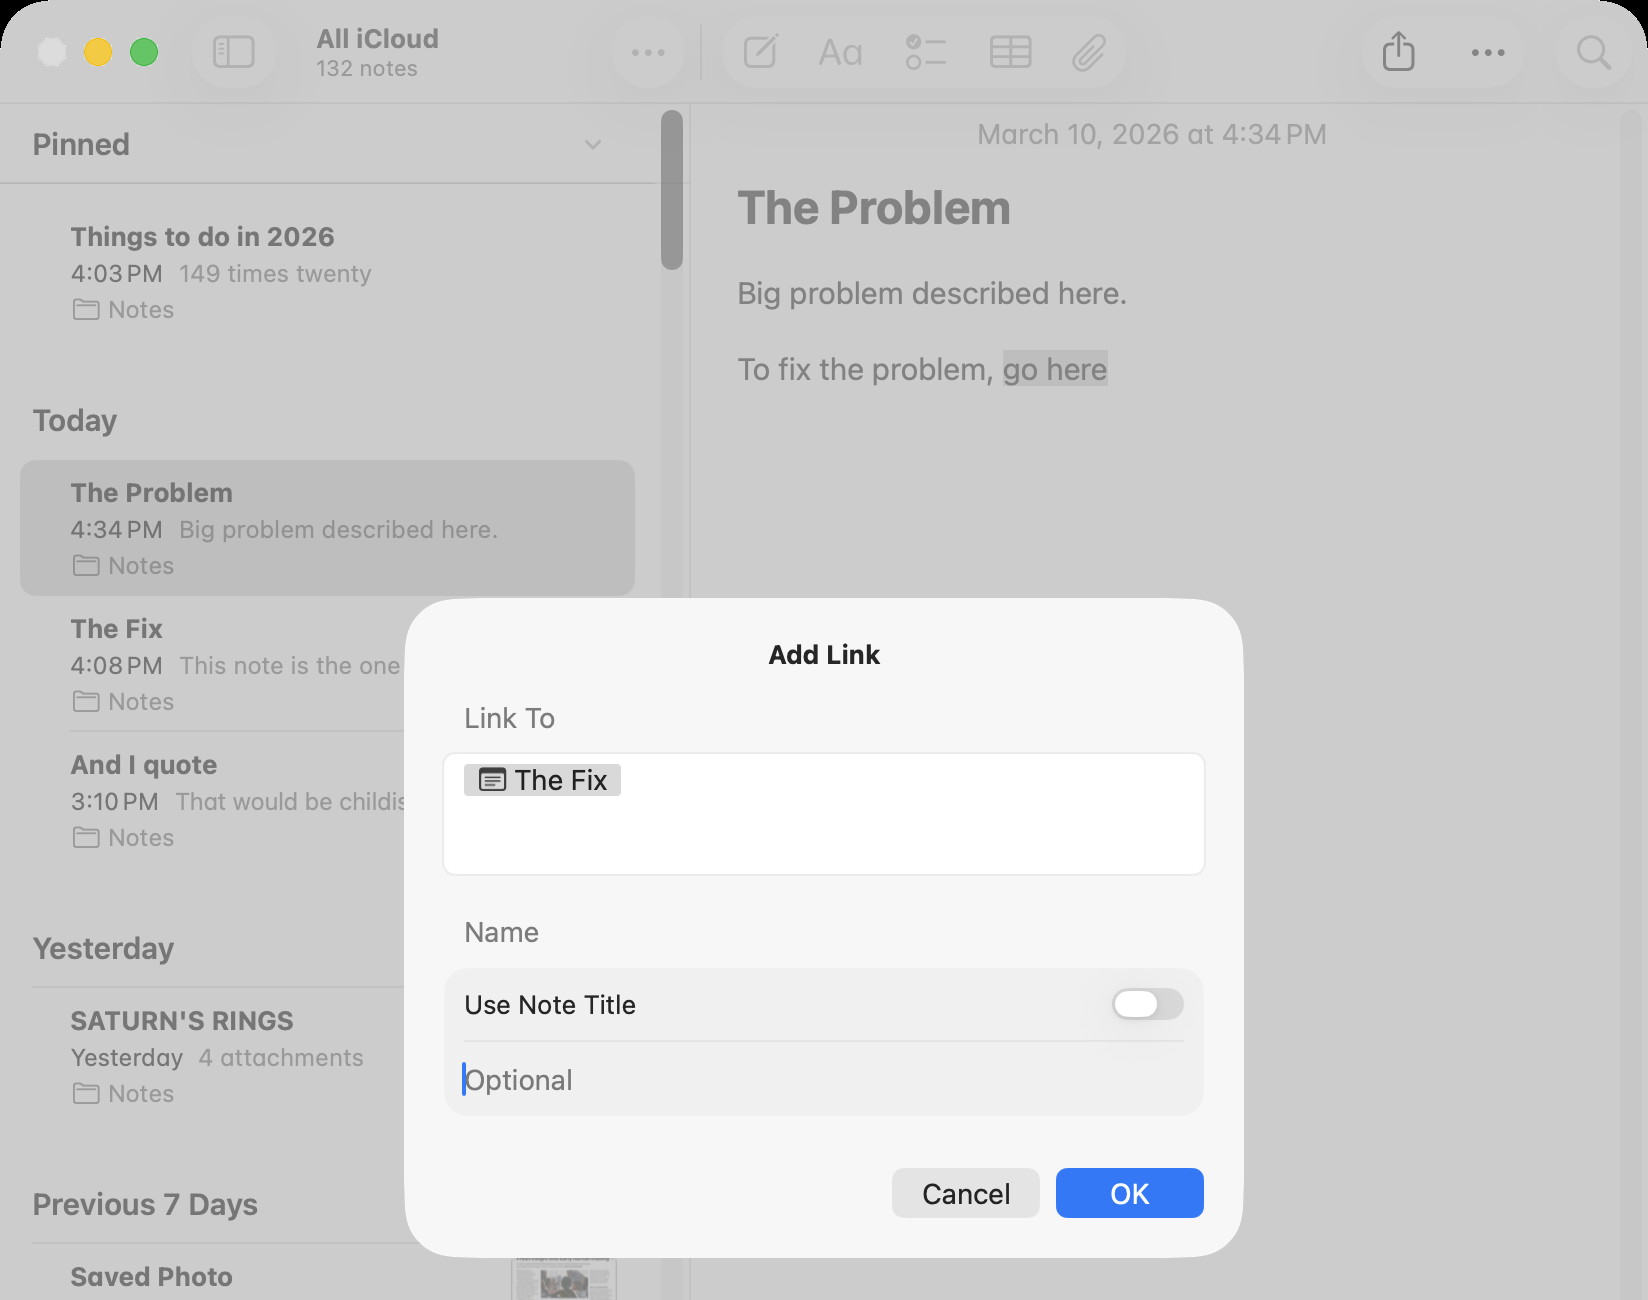
and now whenever you lick on the link it will take you to the Note that you set the link to.
This linking capability can be very useful when you need to have a lot of related notes. For example, when you go on a trip and you need to have separate Notes for destinations, hotels, luggage list, tickets, etc. and have them all linked to from a master Note.
Folders
In the left column there is a list of all the folders. To make a new folder use the menu File -> New Folder or use the icon at ther bottom of the left column

Create a new folder with the File menu.
Note that you can also create a new smart folder from this same menu. Look at all the other functions in this menu too.
When this new folder is highlighted, any new list you creat will be in this folder. You can also copy a note to a different folder by dragging it to folder in the left column
Smart Folders
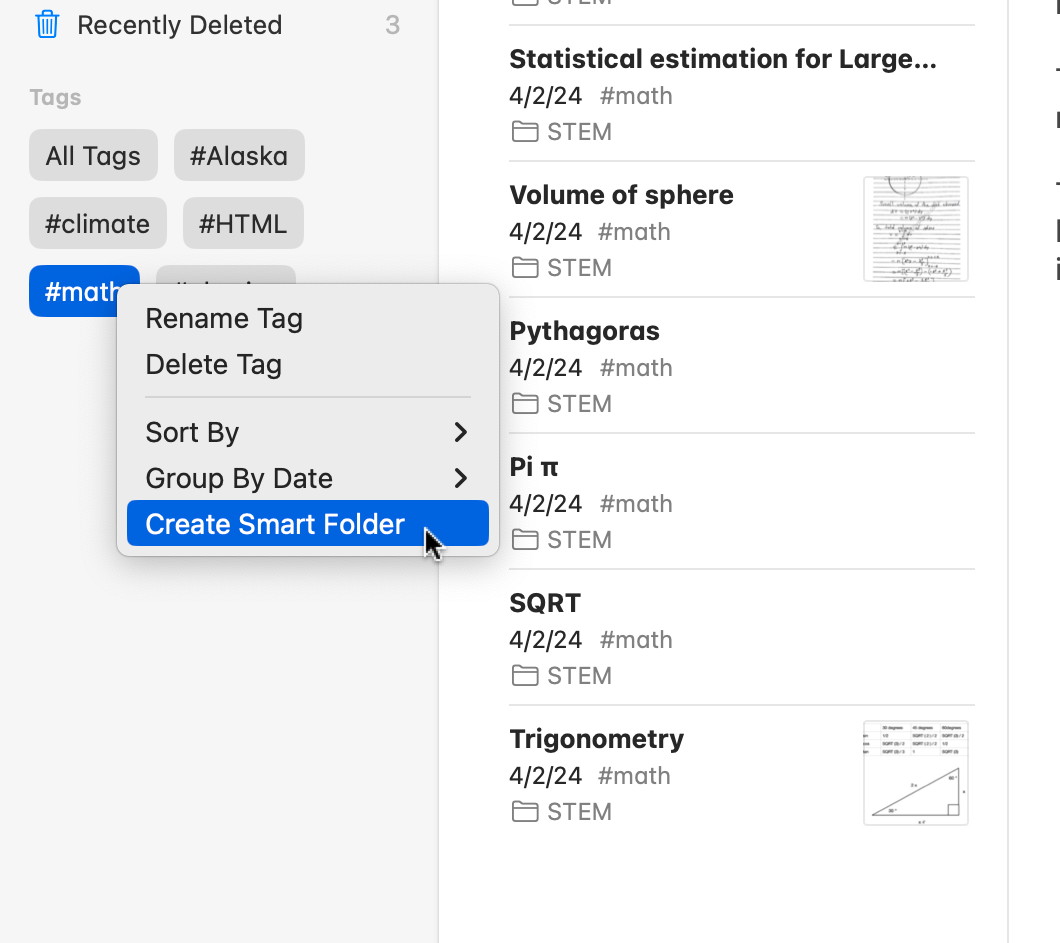
Smart folders are used to stare copies of all the files that share a common tag. They can be made either by using the File meno or by right clicking on an existing tag / tags and using the pop-up menu:
Create a new folder with the File menu.
To convert a Folder to a Smart Folder, Tap a folder, then choose the elipsis (…) icon next to the name and then choose Convert to Smart Folder.
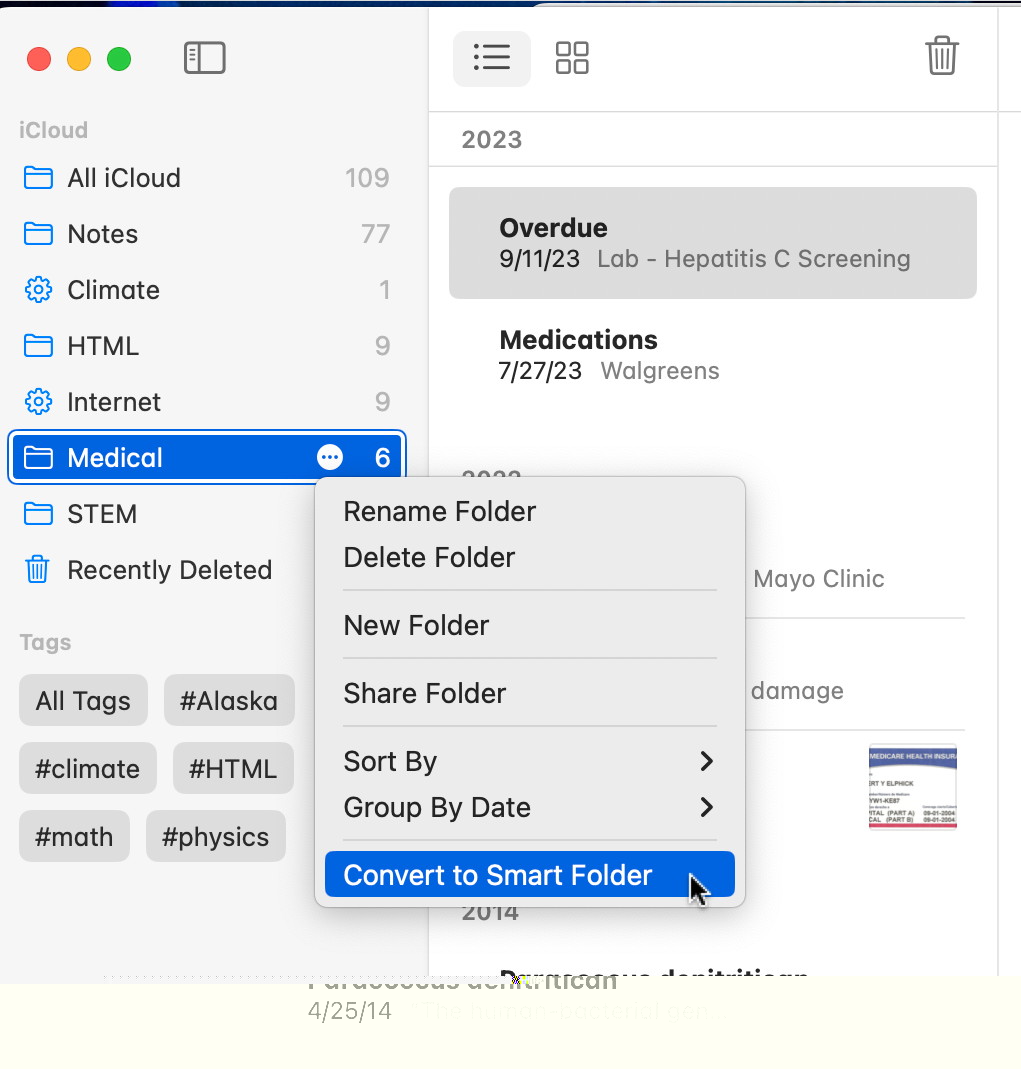
Convert a Folder to a Smart Folder
To edit a Smart Folder, tap and hold it, then choose Edit Smart Folder. Tap Manage Smart Folder to adjust its filters. Deleting a Smart Folder doesn't delete the notes it contains, which remain in their original folders.
