PreviewApple Application for reading and editing PDF and Graphics files.This page is based on a presentation given in March 2018 by Trish Vishnevetsky. CONTENTS
View PDF filesPDF files (Portable Document Format) are files that have a format that can be read by readers on ANY computer system including Unix, Windows, and Macintosh computers. They can include text, graphics and some multimedias files. They are a great way to distribute information when you do not know what computer systems are being used by the receiver. Although they can be opened on a Mac by Adobe PDF readers and other application, the only one a Mac user need is Preview. Preview is part of the Mac operating system. All the other readers can be removed from the Mac. Getting all PDF files to open in Preview If the you double click on a PDF document and it opens in an application other than Preview, then do the following:
The last step will make sure that ALL the PDF files on your computer will open in Preview. Altering PDF filesOnce a PDF file has been created the contents usually remain the same but it is possible to edit some parts and also to Mark-Up the file. Alterations and Markups are much easier to perform if you have both the Markup Toolbar and the Toolbar open - this can be done in the View menu bar if they are not visible. You may want to adjust the Toolbar to include the Inspector and the Makup by using the menu View -> Customise Toolbar .... 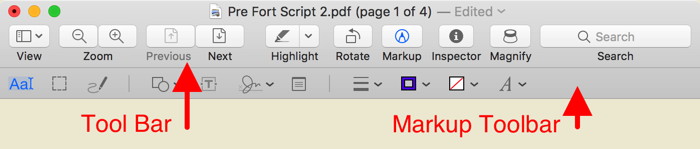
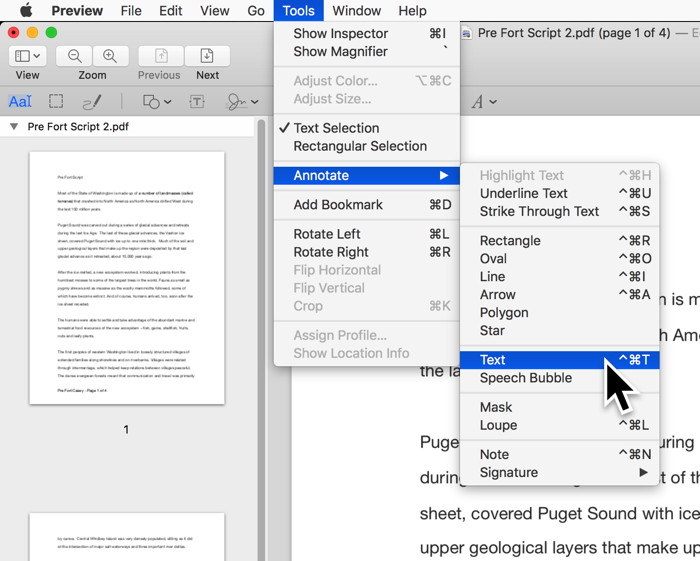
Adding Text Use the following sequence:
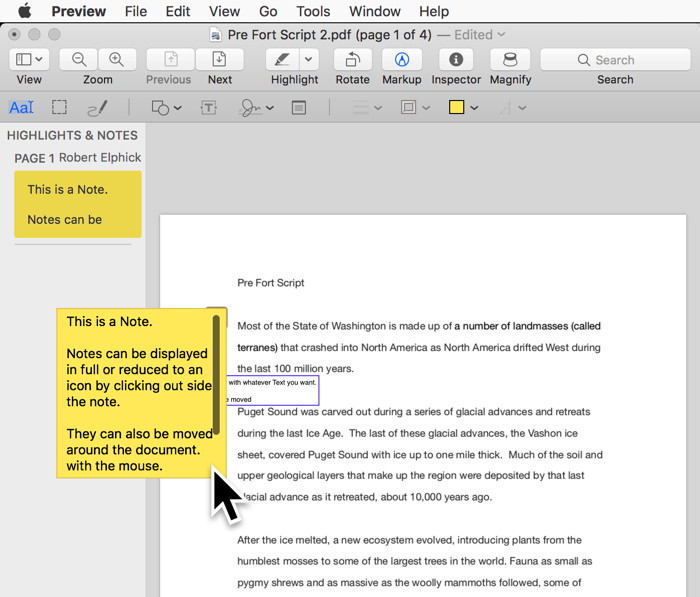
The text box is editable and it can also be moved around. 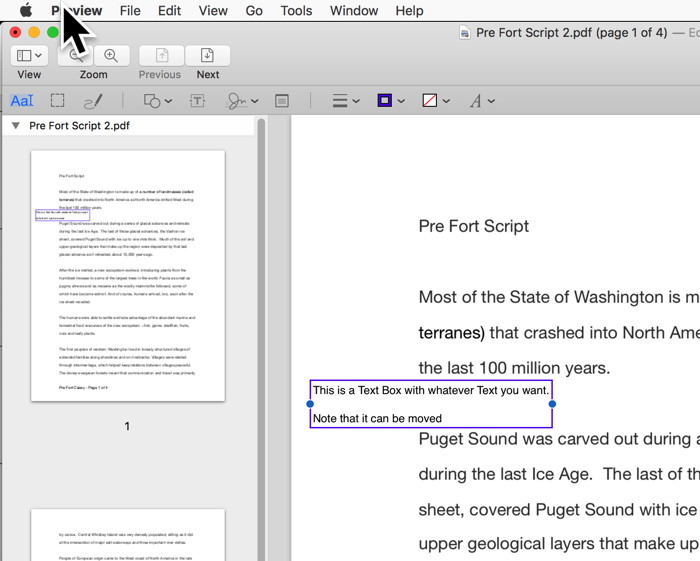
Highlight text To turn highlight mode on or off, click Highlight mode button in the Tool Bar. When highlight mode is on, this highlight button is selected. To change the color or switch to strikethrough or underline, click down caret next to Highlight mode button, then choose an option. When highlight mode is on, highlights appear anytime you select text. To remove a highlight, Control-click the text, then choose Remove Highlight. 
Adding Notes To add a Note:
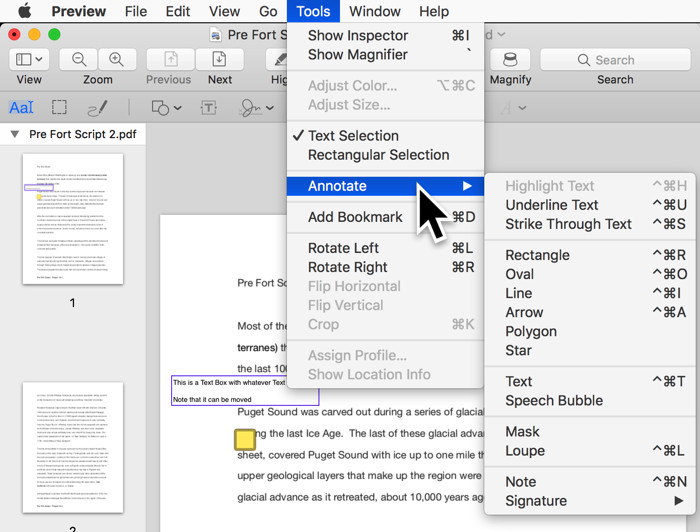
Adding objects
To add Objects:
The best way to find out all the capabilities of these tools is to experiment. A great afternoon's entertainment. 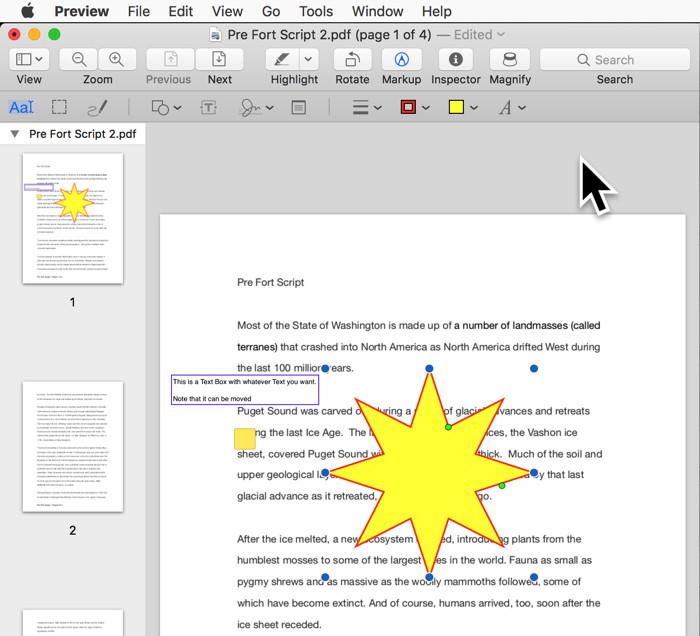 Here is a Star. The green buttons were used to determine the size and number of spikes. The blue buttons are used to determine the size. Creating PDF filesThe Macintosh operating system inclused the ability to create PDF format files from any application that can print. When the Print option is selected (usually from the File menu) on od the option in the Print window is to produce a PDF file instead of sending the document to the Printer. Here is an Example in the Pages application: 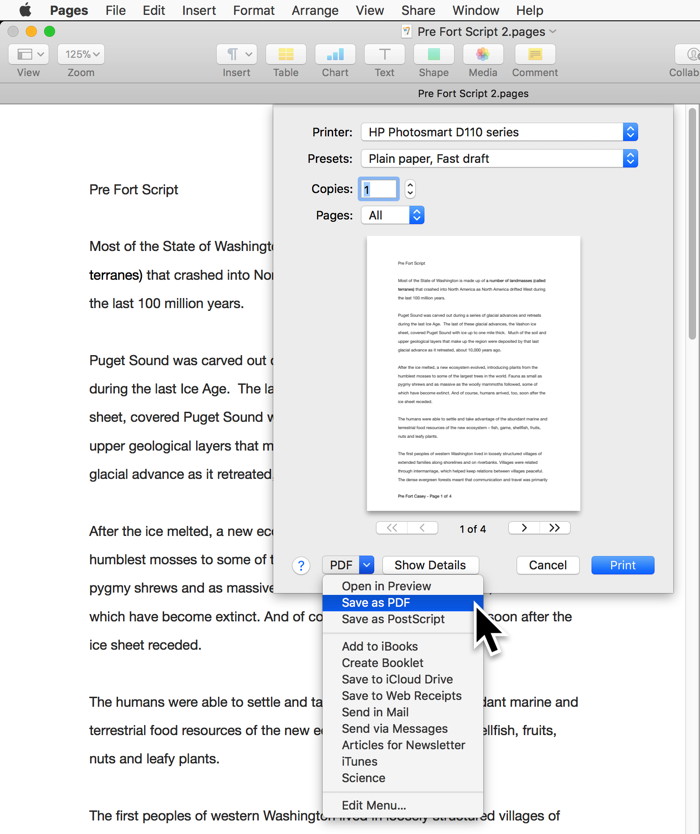
View image filesImage files have many different formats. Common ones are:
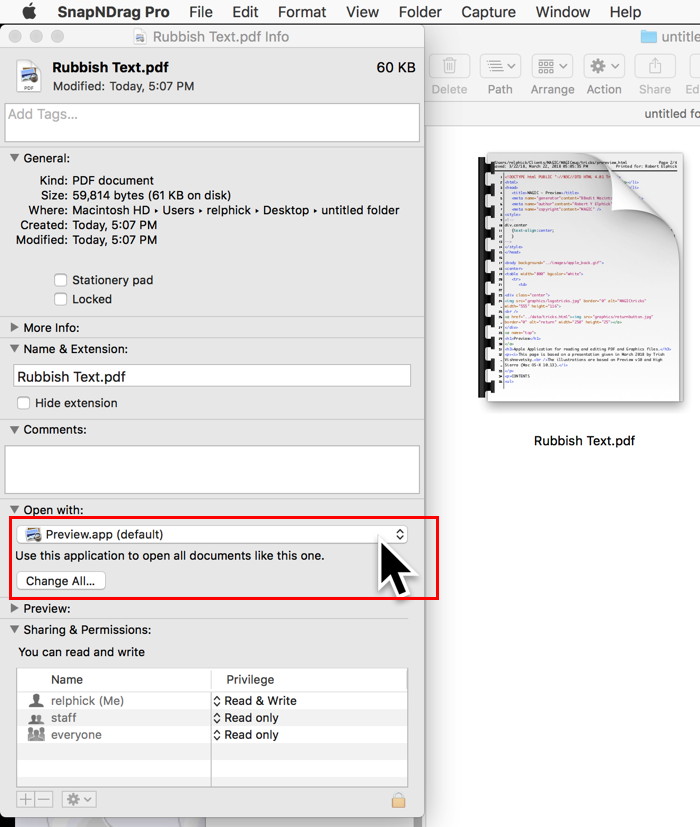
By default, the Mac will open all these formats with Preview when you double click on the icon for the graphic file. If the you double click on a graphic document and it opens in an application other than Preview, then do the following:
Or simply right-click on the icon and choose Open With... and select Preview. 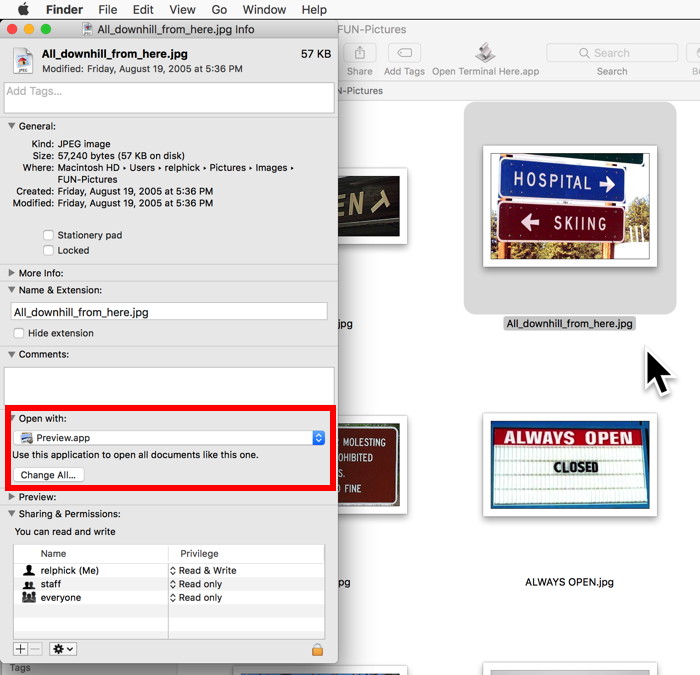
The last step will make sure that ALL the PDF files on your computer will open in Preview. NOTE: You will have to do this for each of the formats that you wish to use Preview to view and edit.
Editing image filesThere are two main approaches to editing graphic files:
Tools Menu This menu has a number of possibilities. Most of which are pretty self explanatory. 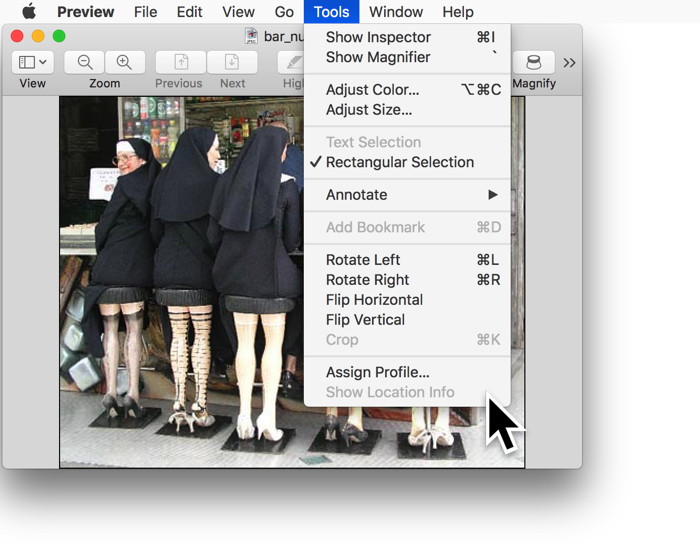
Show Inspector - provides a window with a lot of information about the file. Show Magnifier - provides a circle that magnifies the picture behind it. 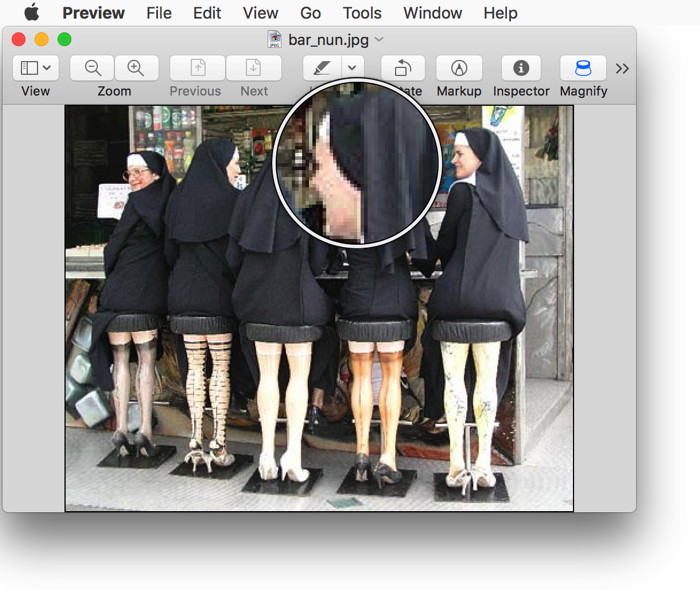
Adjust Color... - provides a window with many color and exposure adjustments. This set of adjustments will allow you to make a poor photo into a professional one once you have mastered it. It is well worth learning how to use this. Note that it is similar to the capabilities of most expensive photo editors but is free! Try out all the sliders and see the effects that they have on a copy of a graphic file. 
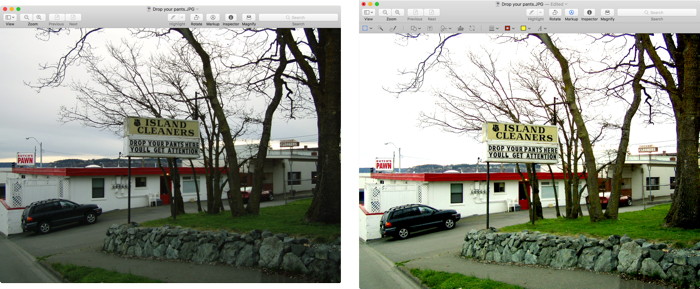 Before and after adjusting an underexposed picture. Adjust Size... - provides a window to edit dimensions. 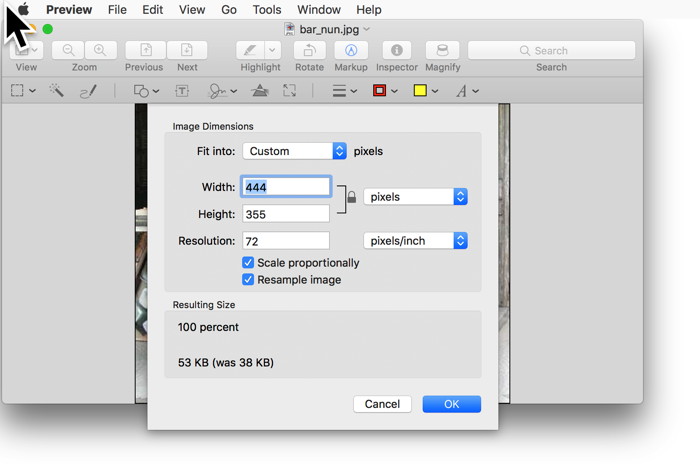
Annotate - This submenu has a number of options. Most are self explanatory and are the same as the options for editing PDF files. 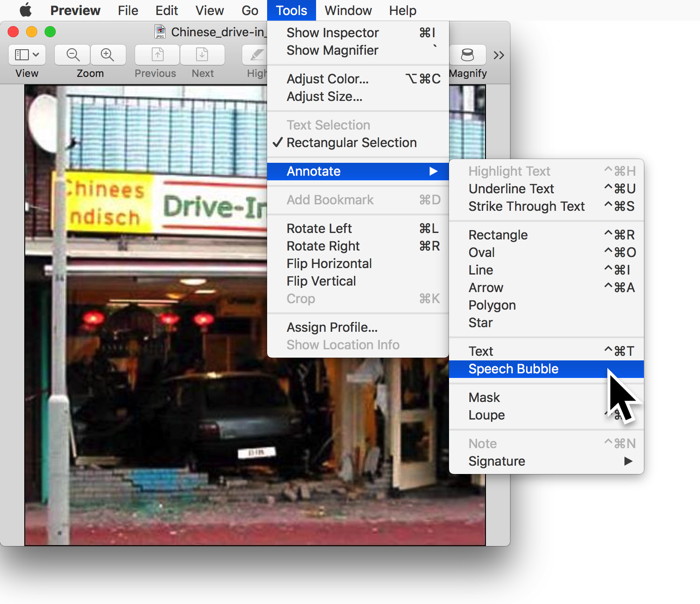 Selecting Speech Bubble option 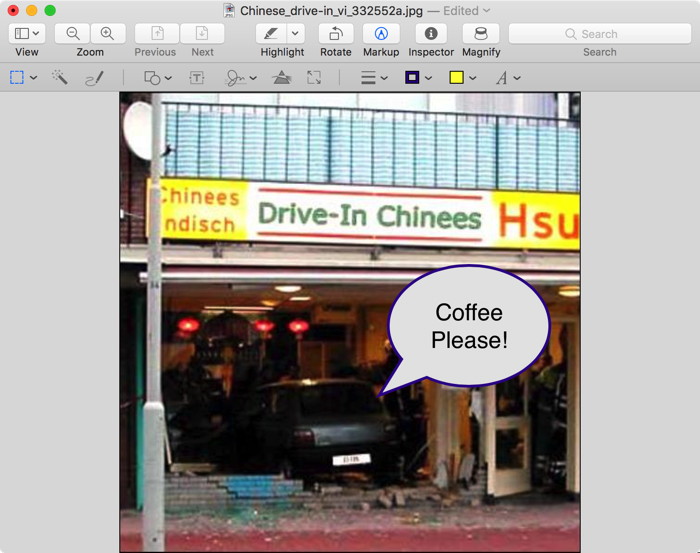 After adding Speech Bubble and Text Rotating and Flipping - Do what they say Crop - Removes portions of the picture from on or more margins.
Markup Toolbar turned on. If the Markup Toolbar is not showing then click on the Markup icon in the Toolbar. If the Markup icon is missing in the Tool bar then use the View -> Customise Toolbar option to drag the icon up to the tool bar 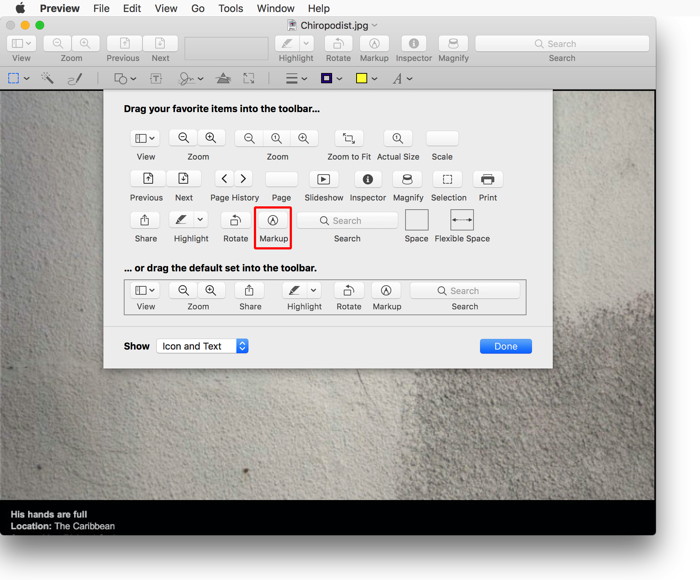
Markup icon. If it is not on the tool bar the drag it up there. The Markup Toolbar now shows up in a number of places on a Mac where graphics are used. This includes Preview, Mail, and Notes. It was added to OS-X with Sierra. Here are the tools in the Markup Toolbar: 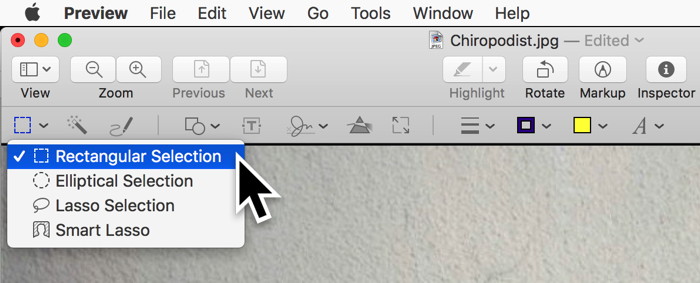
Select tool with four options. 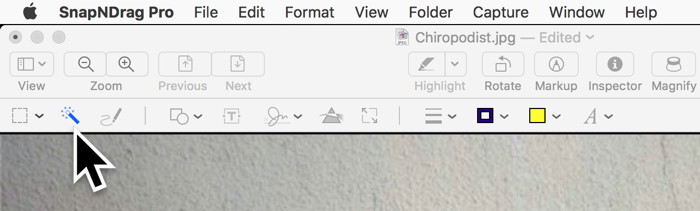
Instant Alpha - Quick picture enhancement. 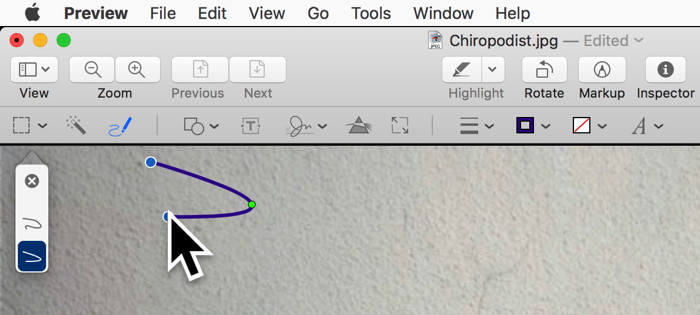
Sketch - Used for freehand drawing or spline curves. Note the blue postion points and the green central spline point can be edited. 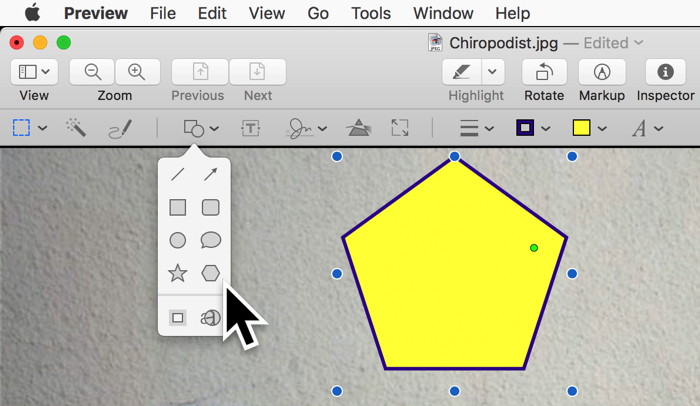
Shape - Used to select a shape tp be drawn Note the blue size points and the green 'number of sides' point can be edited. 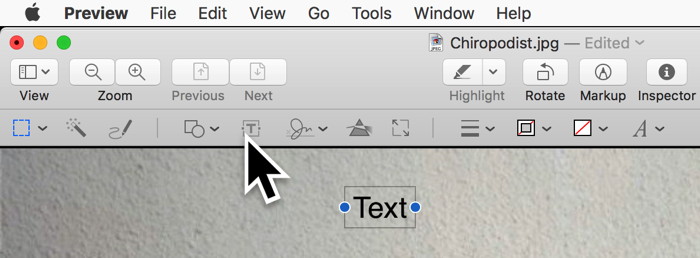
Text - Creates a text box Note the blue size points. 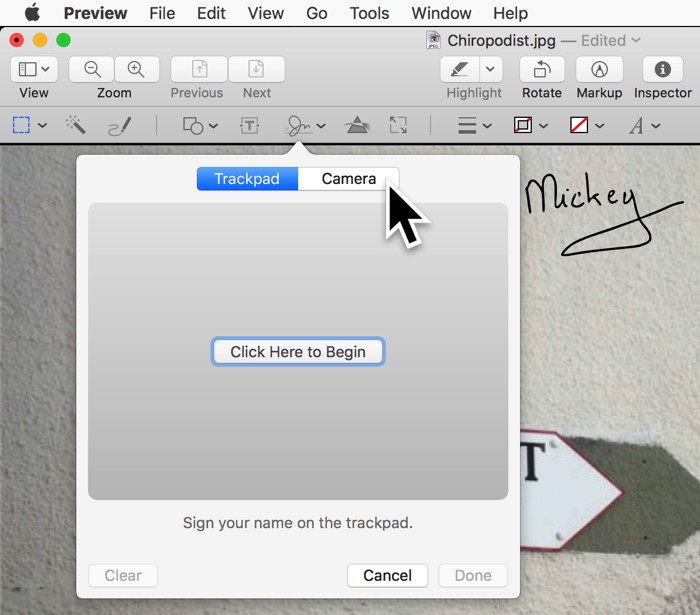
Sign - Captures your signature either with a trackpad or with the built-in camera. The signature then becomes an object that can be pasted to the document. An Example of a captures signature is shown. 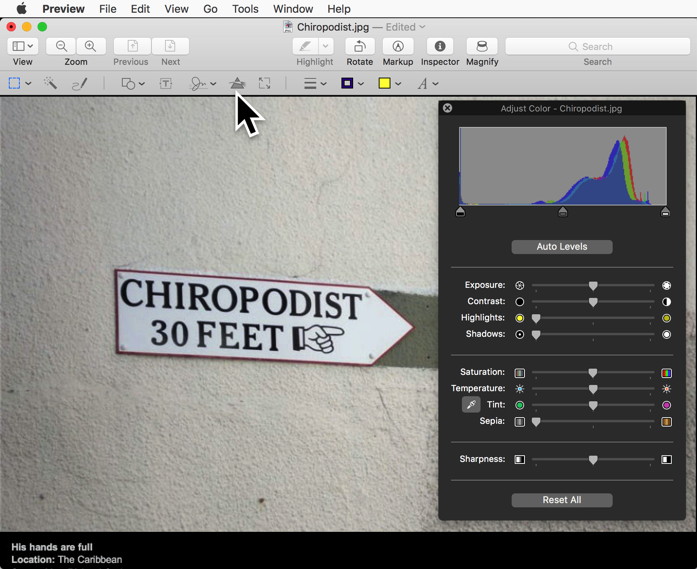
Color Adjust - Provides window with color slide bars. The graphic can be adjusted for Exposure, Contrast, Saturation, and Temperature as well as several other characteristics. 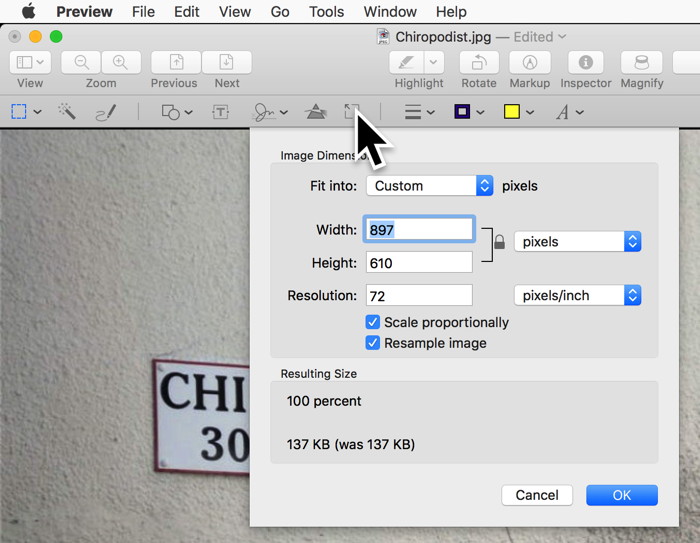
Size Adjust - Provides window to change the size. 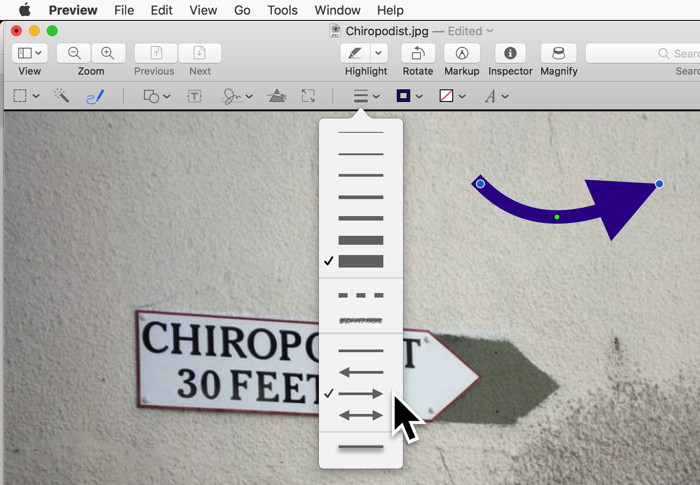
Shape Style - Provides options for borders of objects or styles of lines and/or arrows. Here is an example of an arrow drawn with the Shapes Tool. The green dot is used to edit the curvature. 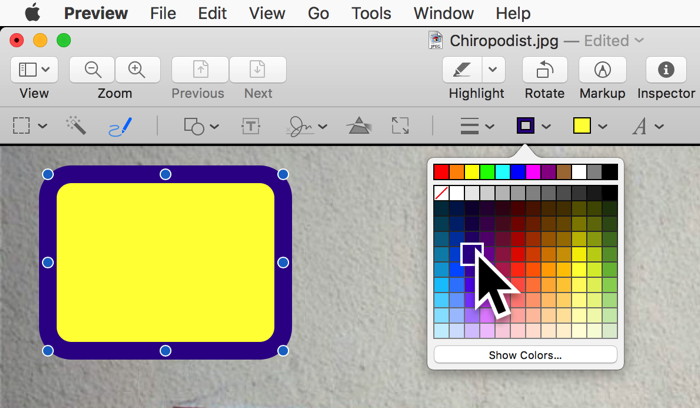
Border Color - Provides an section of colors to be used for a line or an objects border. Here is an example of a rounded box drawn with the Shapes Tool. 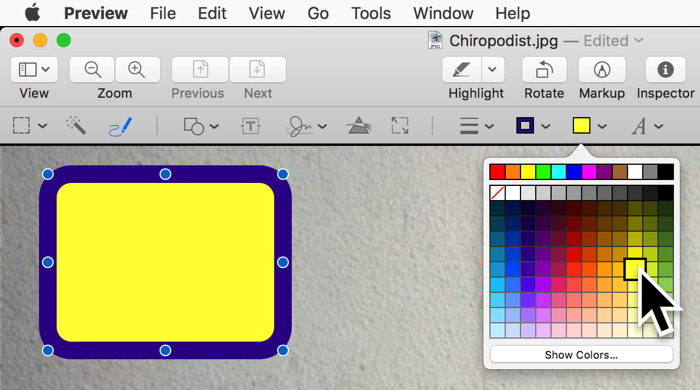
Fill Color - Provides an section of colors to be used to fill an object. Here is an example of a rounded box drawn with the Shapes Tool. 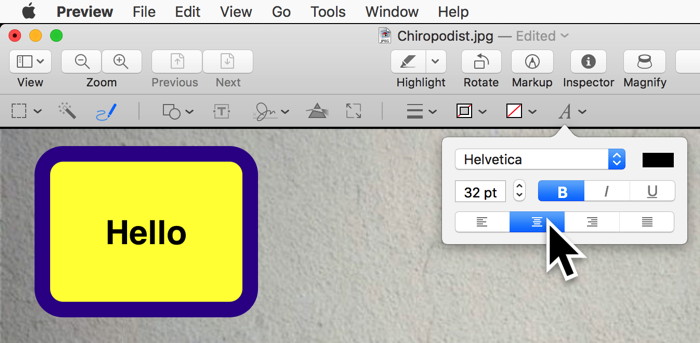
Text Style - Used to select the font and style of the text. Here is an example of text added to a rounded box. ReferencesThe official Apple website has a guide for Preview at this web page. LifeWire also have a good page at this web page.
|